
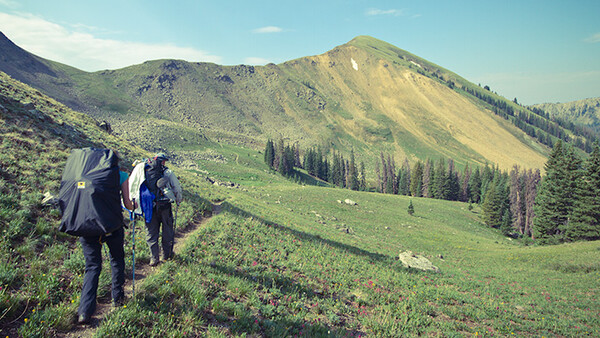
Hiking season is in full swing and in the last few years I've incorporated a lot of video and photography while on week long trips in the backcountry. When every pound of weight counts, you have to choose your gear carefully. In this post I’ll share my tricks and tips for making a useful kit without weighing you down.
I should preface this article by noting that it is primarily for enthusiasts or advanced amateurs, not necessarily pros out on an expedition to capture athletes. That’s not to say they might not learn a thing or two here, but often my shoots in the backcountry are for personal or charity projects, meaning I don’t have a helicopter dropping me off on the side of mountain with 8 generators and 30' cranes.
A great example of the quality of production I’ll be speaking to can be seen in the film, Mile… Mile and a Half. If you haven’t seen this amazing documentary, get it from iTunes or if you have Netflix it’s on there. Below is the trailer for it.
Basically a group of artists backpacked for several weeks along the John Muir Trail, and created various forms of multimedia (in addition to hiking many miles and being away from civilization.)
I interviewed the creators of this film, and learned a few things from them that I’ve incorporated into my list below. Additionally, I’ll include some tips that will apply to going on day hikes, and make the photo or video capture process easier and more convenient.
Choose your lightest kit based on the media to plan to capture.
DSLRs are the starting point for most, as well as myself. They are compact and offer a fantastic image quality to weight/space ratio. Your camera body and supporting kit will vary depending on if you plan to shoot timelapses, landscapes stills, wildlife video, or astrophotography. For example, when shooting mostly video, I take my Canon 60D since it is smaller, lighter, and has a flip out LCD screen. If capturing primarily stills, then I might step it up to a 7D or 5D that has more megapixels and advanced features for still image capture. If I really wanted to save on weight, systems like the Panasonic GH3 or GH4 are noticeably lighter and have smaller lenses, while still taking great images.
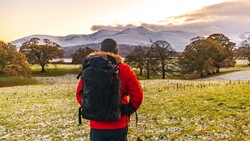
Use a backpack that makes it easy to stop and get to your kit.
Protecting your valuables is important, but the reason why you brought that 70-200 was to use it! If you cram your kit into the depths of your bag, you won’t want to stop and get it into it when you’ve got a good hiking rhythm on the trail. By making your lenses and kit as easily accessible as possible, you won’t talk yourself out of a lens change or grabbing a polarizer even when you know it would help the shot.
For day hikes, bags like the F-Stop Gear Loka and LowePro RoverPro are great for taking a lot of kit and making it highly accessible. For longer excursions, I’ve tried a number of different things, and they vary from trip to trip. Most often I’ll have a small, lightweight padded pouch (like the F-Stop ICU or LowePro inserts) that will reside in the most accessible area in my large backpack, usually an Osprey or Gregory. I’ve also used padded lens pouches and looped them onto my hip belt to keep smaller lenses within reach.
A carbon fiber tripod is great, but how about a hiking pole that serves as a monopod?
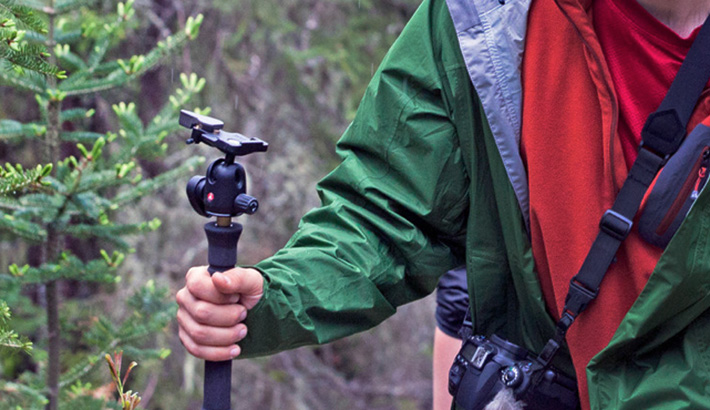
I’ve done this on a few different trips. Some hiking poles offer a “camera mount” which is basically a ¼-20” screw at the top. This is cool, but take it one step further and put an adapter screw on it to adapt it to a 3/8” thread, and then put a lightweight ballhead on it. This is great for capturing stable video right in the middle of your hike without having to stop to setup a tripod.
Choose zoom lenses.
Stopping while hiking and taking off your pack, finding a lens, switching them, getting the shot, then packing up your bag to begin hiking again takes too long. After 6 sweaty miles, it’s hard to find motivation to drop your pack for a lens change, but if you have a versatile lens at the ready, you won’t have to.
Primes are nice but when in the field, being versatile and fast are key to getting the shot. You won’t always have the space or room to put yourself in the position you might need to be if you’re limited by the focal length of a prime lens. A mid-range zoom lens that is f/2.8 through the whole range is my primary lens while hiking, allowing me to get reasonable shots of the scenery, but also punch in to get closer detail shots. I will say that if you have the space to spare, a wide prime lens can be sometimes be small and light enough to justify including.

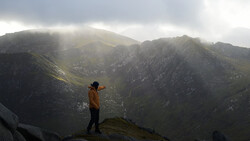
Whip it out on the trail.
Don’t hike with your big lens in your backpack. If you’re after wildlife shots especially, there’s no time to drop your pack and get situated. The shot is gone by then. I use Think Tank Camera Straps to hike with my camera out, and keep my hands free, as demonstrated in this video. It will be much more comfortable than hiking with a camera hanging around your neck, and it is better for your balance when hiking a tough trail with a heavy load.
Take a GoPro!
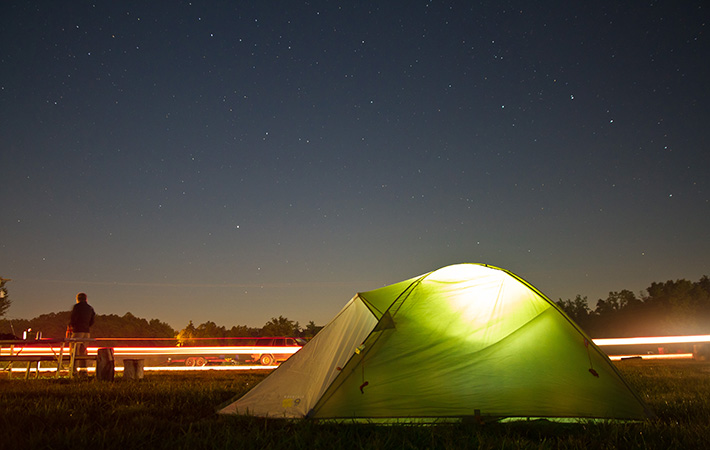
The quality of GoPros have continually gotten better. They are obviously great for unique POV shots, and the whole headmounting thing, but they can also be a backup camera system that is compact and lightweight. They become an independent system for me, capturing one thing while I’m shooting another. I use them to shoot timelapses of camp being setup or of the clouds moving across the landscape. Underwater shots are fun too. Battery life can be a pain, so solar charging kits may be in order if you plan to be out for more than a few days. In the video below, my GoPro was essential for capturing quick timelapses that helped to accentuate the passage of time and made for great transitional clips.
For audio, pick one device and go with it.
My short list is always one of two things: a Zoom H1 with a small lav mic, or the Rode VideoMic Pro. They both have their pros and cons. In quiet outdoor settings, the Rode will get you usable audio from both people and nature, but only while the camera is rolling. The Zoom will let you get closer to these actions independently, and can be great for NAT sound of things like waterfalls and animal calls. You don’t need both, but using at least one will increase your audio production level.
Leave the telephoto lens at home if you're not shooting wildlife.
The heaviest piece of kit I bring is almost always a bulky telephoto lens. I definitely use it to capture wildlife, but if that isn’t at the top of my list, I’ll leave it behind. In it’s place, I’ll bring something that is a fraction of the size and weight, but can get me shots that are similar in focal length: a lens extender. At the cost of a little light and a little quality, extenders can be a great addition to smaller kits where you just might need a bit more reach on a few shots.
Multipurpose Gear 1 – Headlamps
Headlamps can be a light source when in dark places or when the sun starts to set. If you plan to light a person, you can hang the light on a tree branch, aim it through a bush to break it up a bit, or even use it to light up tents at night.
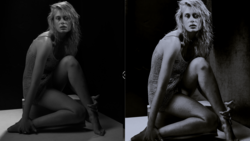
Multipurpose Gear 2 – Emergency Blanket
For multiday trips, you may have one of these shiny emergency blankets in your kit. Consider using it as a bounce for the sun when you want to fill in the shadows of a person or area.
Multipurpose Gear 3 – Rainjacket
If you’re worried about sand, wind, or rain, use your rainjacket to also protect your camera rig while hiking or shooting around camp. Those detail shots of inclement weather often provide unique opportunities for visuals, and can really add drama to a story. If your rain jacket isn’t big enough for the both of you, get a pack cover and use that. In a pinch, a plastic bag works fine too.
A few more quick ones:
• Use step up/down rings to use one filter on multiple lenses.
• Instead of packing a macro lens, consider using a close-up lens to save space.
• Use just a couple of large capacity media cards. Not having to switch cards means one less thing to do when covered in dirt and sweat.
• To monitor sound, leave the bulky headphones at home and just use some earbuds like the ones that come with an iPhone. They weigh practically nothing.
• Use cameras with built in intervalometers. Some DSLRs need Magic Lantern for this, but it’s one less piece of kit to bring if you can do it.
Got any gear tips to share that you learned from taking your kit on a short or even multi-day trip?

Join the Fstoppers community for free
-
Post comments and join in the discussions
-
Browse the site ad-free
-
Share your work and get featured in the community
-
Compete in the photo contests for fun and prizes
17 Comments
Nice write-up. Other great hiking photo bags, with hydration bladder options - EVOC - I have both the CP26L & CP35L. Expensive and not really meant for multi-day hikes, but the best single day hiking/activity bags I've used so far.
When i did the JMT I was the only one who didn't break their camera :)
My point-and-shoot broke, and didn't record a single photo over the entire JMT. I still cry about it.
What kind of power solution did you use?
I'm not sure what they use but I use the Biolite camp stove and it works great, a little on the heavy side but makes way more power than something like a solar panel.
Although it's not a post about ultralight backpacking, TrailPix is a nifty gadget helping to shed some weight - it uses trekking, ski or tent poles to form a tripod (www.trail-pix.com).
For a quick camera draw on my backpacking trips I also use a Capture Pro clip (from Peak Design) attached to my backpack's shoulder strap. Camera plate is either Arca or Manfrotto RC2
compatible, so if you are taking your tripod with you, there is less fuss with swapping camera plates.
Also - a dry bag can really save your equipment, when you get caught on a heavy downpour. Backpacks rain covers are good for light rain only, as with heavy rain water gets to your pack from back side. I ditched my rain cover completely and got cheap plastic poncho instead (I still take my rain jacket) - because you can put it over yourself and a backpack.
To save space and weight I keep my camera in a neoprene laptop sleeve and put it a dry bag for the night, as it helps with condensation due to temperature and air pressure changes. Sometimes I even use freezer Ziploc bags on each lens.
When temps at night drop close to freezing - take the batteries out of your camera (and spares too) and put them in your chest pocket while sleeping - they will last longer.
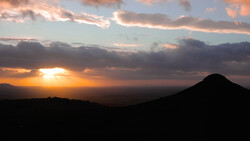
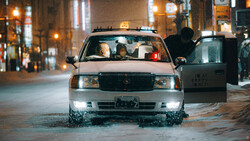
And one last thing - if leaving your camera for the night to shoot a timel apse, or star trails - make sure to check the forecast, so you don't end up like this poor guy:
Anyone has any experience with the 28-300 lens on a D800, for travel proposes?
Yes, that's my goto setup for travel with a 14mm for things like church interiors. You can see some examples here: http://photographicvisions.ca/travel/
If you don't need selective focus to isolate subjects, you probably don't need a DSLR or a sans mirror. A lightweight pocket camera such as the Nikon Coolpix P330 will do fine, as will a camera of the Coolpix P7800 genre. If battery charging is a problem, use a small sensor camera powered by AA cells.
Back in the days of film, I backpacked with an SLR, 24mm and 100mm lenses, sometimes adding a 55mm micro, a very small flash, and an 18-ounce 5-foot tripod. I still use the tripod, but nowadays I leave my DSLR at home and use a Coolpix 5400 or P310 (I don't photograph wildlife) and pack an extra battery. The P310 is my favorite despite not having RAW because it has acceptable video.
Those are my personal preferences. Other people may choose other equipment. There are many fine cameras from which to choose, so the best camera is the one that you find comfortable to carry and shoot, because that's the camera you'll use instead of keep stashed in your pack.
I agree in regards to using the camera that you like most but for me I'd say the loss of image quality to move down to something like a coolpix would be reason enough to stick with a DSLR or Mirrorless camera.
What great timing, I'm going out with some photogs this weekend to do a mini-documentary on them. It' no 25 day hike or anything, but we are camping up on the top of a small mountain, I will put all these great tips to good use, thanks!
f4 glass over f2.8.... you rarely if ever are shooting at 2.8 when hiking and the reduced weight of the f4 versions is generally a better bet (assuming you are using a full size DLSR body)
Just to give an idea of where I save weight when needed,
Canon 70-200 F2.8L IS II (the default option for most photographers) 1490g
Canon 70-200 F4L - besides costing around 25-30% of the price of the above weighs in at 705g
I have found the Capture Pro by Peak Design has helped me tons in keeping my camera accessible while on the trail. I actually first discovered it while running into a gentleman who was using one in the Grand Canyon. http://adventuretravelbuzz.com/peak-designs-capture-pro/
Does it work ok with a larger zoom lens?
i've used it with only the 24-105. Though I imagine it would work with the 70-200, just may be slightly clumsy. I'll see if I can find one to try it with and get back to you.
Love this. Il second the Osprey choice, I've been a regular on back country trails since before I was born and I have never found a pack more comfortable.
Though I am curious where they got the paints, easel, and canvases during a 30 day expedition in the backcountry? Didn't notice anything like that strapped to anyone's back during the group hiking scenes.
Useful tips here. You mentioned about solar chargers for GoPros, can you advise good one?