
We’ve all been there, stuck with bad light and fresh out of ideas. I may spend up to an hour pre-lighting before a model or subject steps onto set, I work out the kinks and make sure everything is how it should be. But, despite my best efforts to make it right, every now and then I run out of time and have to wing it. We all have our “go to” lighting scenarios, but when you’re standing in unknown territory, keep the following tips in mind and you just might make it through the storm.
Too Much, Or Not Enough Ambiance
When shooting on location, I love blending and mixing ambient light with artificial light. It can add drama and a mood that natural light just cannot produce. But, sometimes adding too much ambience with artificial light can take away from the image and have a negative impact. On the same token, a shot with not enough ambience and a barrage of flash can look cheap and overdone. Check out my article “Up the Ambient, Create Beautiful Portraits by Mimicking Daylight” where I cover this exact dilemma. Shutter speed controls ambient light and does not affect artificial light, which provides the opportunity to increase the exposure of natural light to balance both the flash and ambiance. It simply depends on the mood and feeling you want your image to express, but remember ambience light is a powerful tool and should never be ignored with a standard 1/200 shutter speed.

Right Face, Wrong Modification
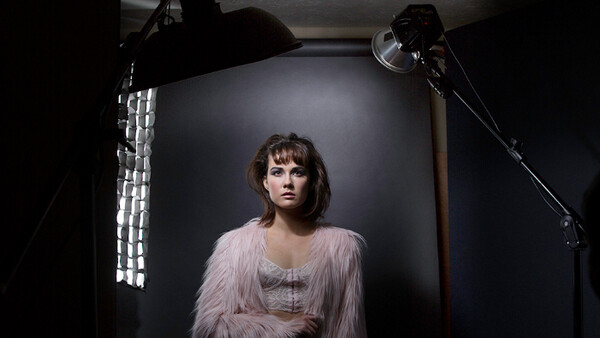
There is beauty in every face, whether your subject is round, slim, soft or hard there is a right modifier for every sort of face. And with that said, there is a wrong modifier for every sort of face. I can’t tell you how many times I’ve setup a light scenario and pre-lit for hours only to find that the modifier I landed on wasn’t right for the person I was shooting. It sends everyone into a frenzy to find the right light, but with experience you know what’s right and what is wrong. As a general rule, I've found that hard light only works for people with strong jaw lines and slim faces. Soft light really plays well to people with more round faces. In example, I probably wouldn’t use a silver beauty dish for a headshot portrait of a lawyer, unless it was an editorial look I was going for. So, find what works for your style and be sure to analyze who you’re shooting before they step in front of your lens and under your lights.
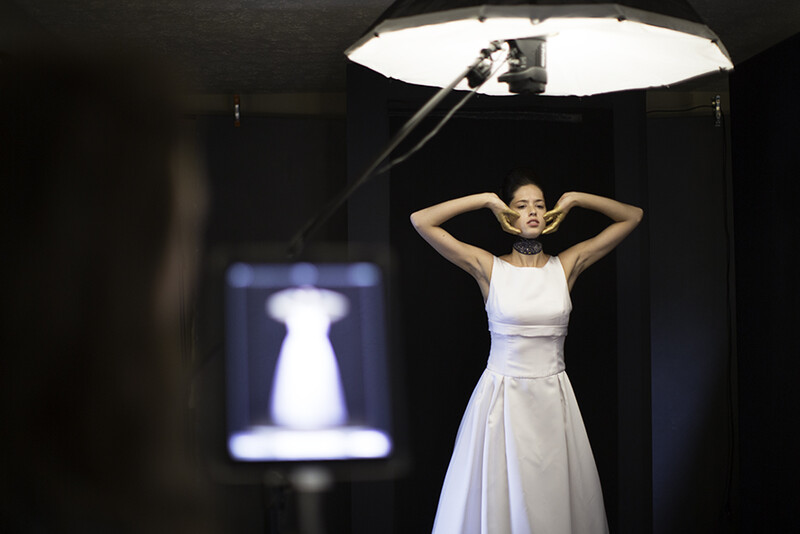
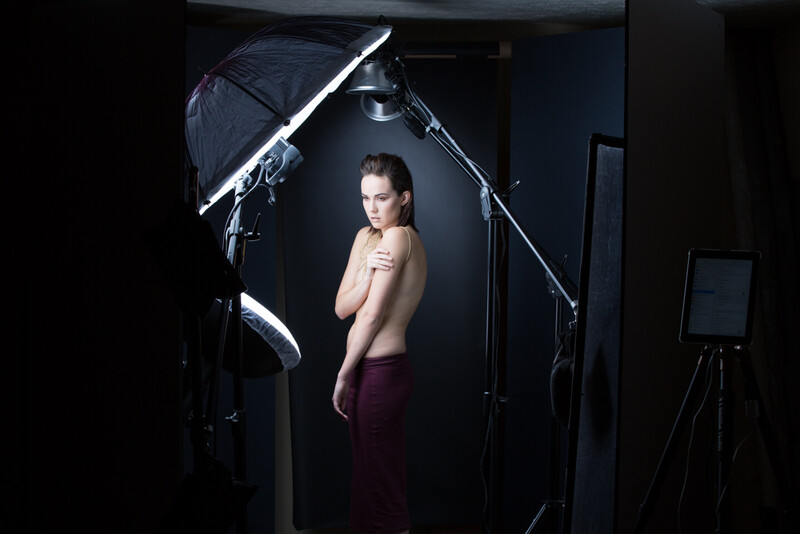
More Boom
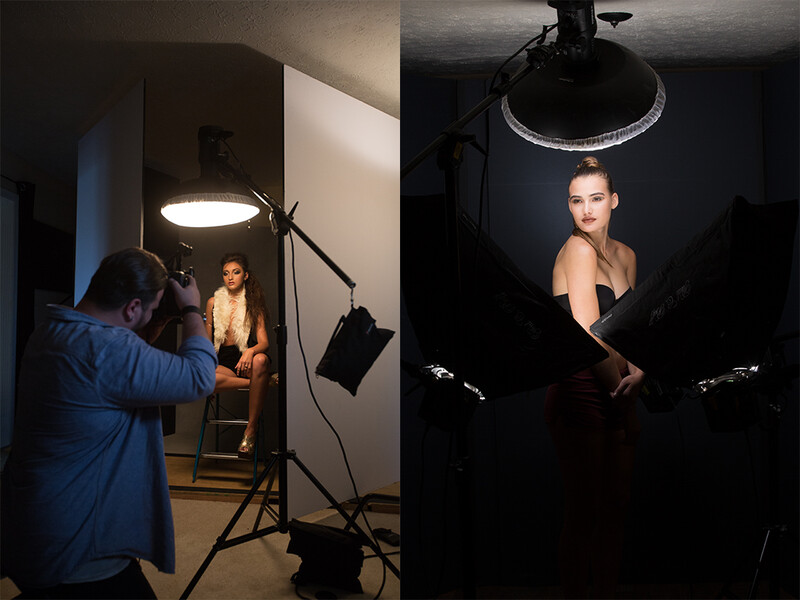
I always loved the look of a boomed overhead light, it’s empowering and dramatiic. When I first started photography, I knew I needed a boom stand, but I couldn’t afford anything nice. And, I was certainly not going to boom out an expensive light on an inexpensive stand. So, I tried different methods such as clamping a light to a background stand or hanging a light from the ceiling. The attempts were successful, but completely impractical. When I finally decided to invest in a boom stand, it really changed everything for me. I was able to put my lights in positions and places that is simply impossible with a regular light stand. If you’ve ever seen behind the scenes stills from big productions, lighting grips usually have some sort of soft light source from directly above which imitates natural overhead light. When all else fails put a soft light overhead and work forward from there.
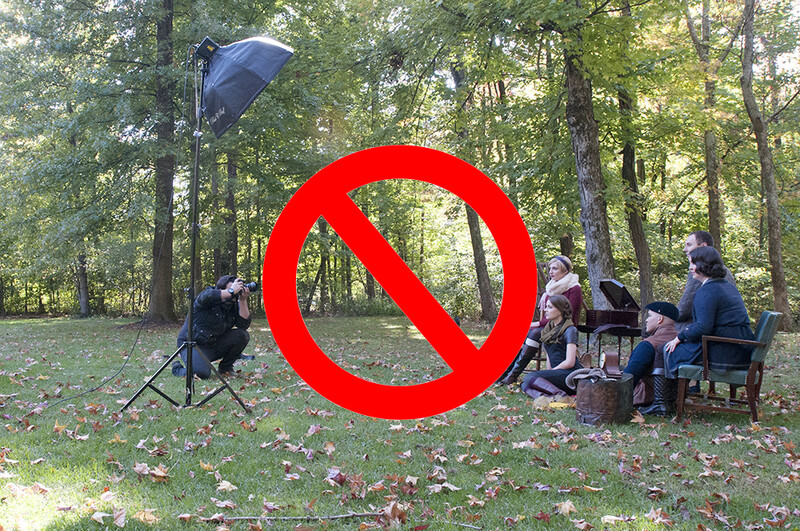
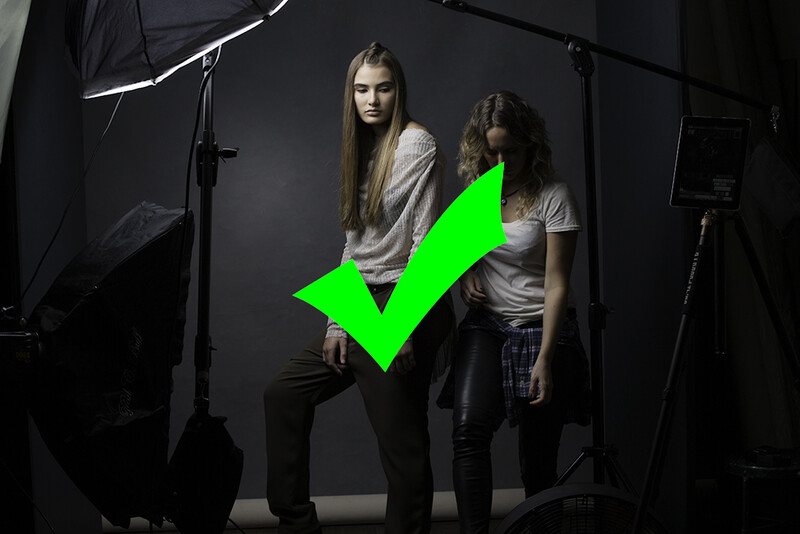
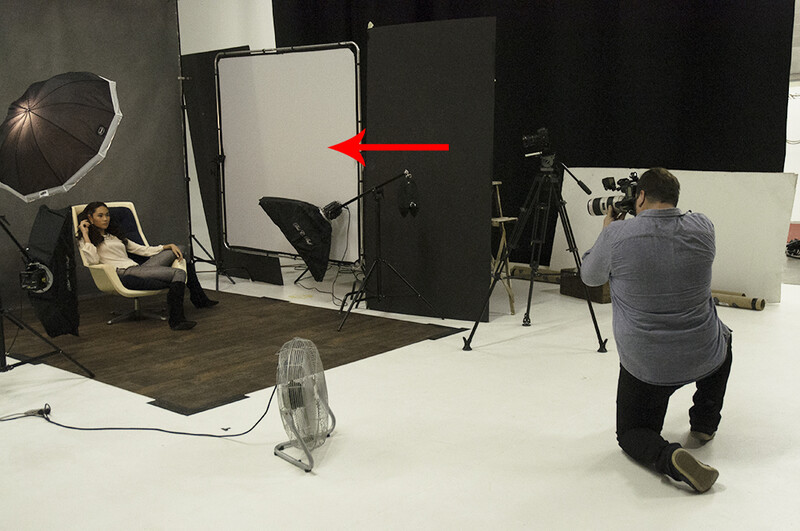
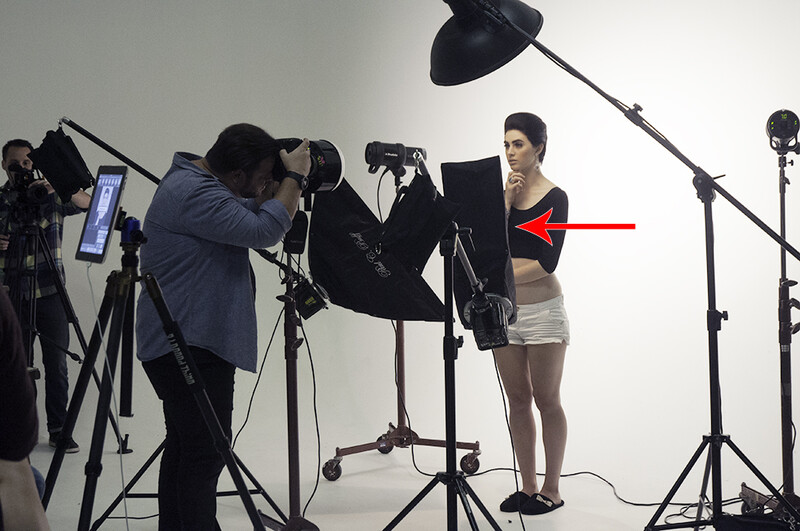
Too Far And Away
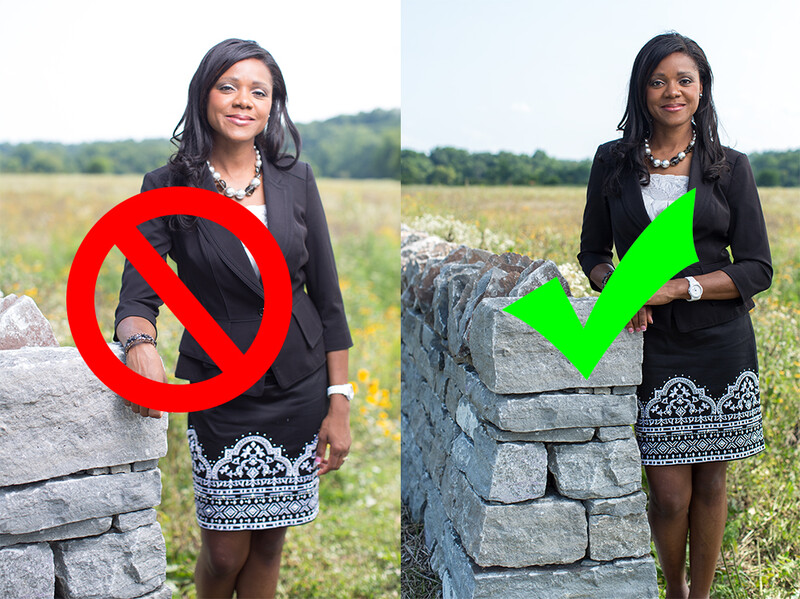
During my normal daily cruise through Facebook, I come across tons of behind the scenes images in which I see photographers place their soft modified light source 10-15 feet away from the subject and parallel to themselves, resulting in a nice flat light. The closer the light source is to the subject the softer the light will fall on the face. Don't be afraid to place that light close to your subjects face and body. On many occasions, I have had the light less than a foot from the cheek and if you were to look at my RAW images, the modifier can be clearly seen in the frame. But, with a quick cloning session in Photoshop any and all distractions can be removed. If you’re going for a harder light, then stick that light even further, 15-20 feet back from the subject! But, if your objective is soft light, get that light close, 1-2 feet close. If you're weary of having the light in the shot, invest in a boom stand.
Overlighting
We’re all guilty of this. Just this past week, I had the bright idea to experiment with a 6-light beauty setup and really step into unfamiliar ground with fill from a beauty dish. Was it overkill? Yes. Was it good? Eh. Lighting is a game of light and shadows, drama is caused by shadows not light. That is exactly what I failed to realize. If you’re stuck in a light setup, then stop, backtrack and start reducing the amount of light by taking away strobes, you’ll see an increase in shadows and perhaps the dramatic image you’re seeking. If you still need a stroke of inspiration to get back into the game, check out my article “Beyond The Key - Building A Subtle Light Setup,” which provides some insight into how I build subtle light scenarios.
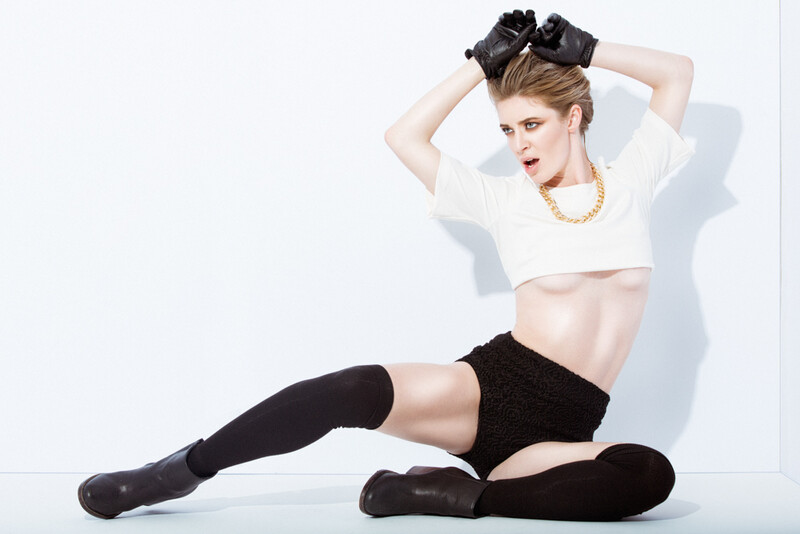
Don’t Forget A Fill
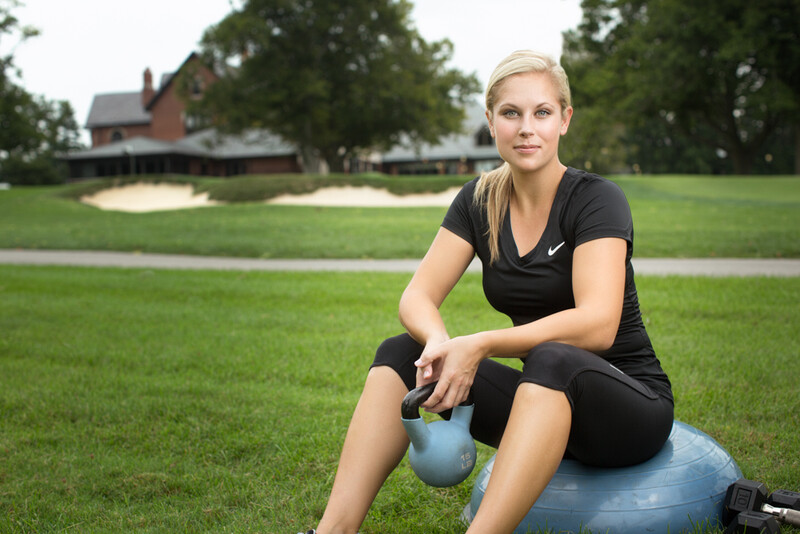
You just never know, everything might be where it should be and the only thing you might be forgetting is a simple chest-level fill from a reflector. It can provide an amazing pop and some beautiful catchlights. By setting a softly modified light source or a piece of white foam core next to those strong shadows, you can reduce the contrast and provide more playing room in post processing. Many photographers use fill under the chest for beauty or fill opposite of the key light for less shadow density. Although this isn't a pivotal point of light, it can definitely help out when you need it most. A fill light should not be forgotten while working with light.
Sometimes, it all just doesn’t work. But keep trying, keep working at it and take it one step at a time. Perhaps, a simple tip of the face or turn of the subject’s body can completely change the game, so don’t get discouraged when the first shot isn’t what you expect.
At the end of the day, if you have solid subject matter, a happy client and good result then the light was right.
Join the Fstoppers community for free
-
Post comments and join in the discussions
-
Browse the site ad-free
-
Share your work and get featured in the community
-
Compete in the photo contests for fun and prizes
67 Comments
Great article! I really got some good tips from this one, the only one I'm somewhat sceptical about is to move that light source closer to a group in a group shot where people are of varying distance from the light source and the camera. The reason for this is due to the inverted square law and the fact that because of the greater variance in light when you have the light source close to the group. For example, if you shoot people who are standing in rows, when you have the light too close to the group, the second group might be half a stop or a stop under exposed, if you had a third row they would be even further under exposed. You might be able to solve this issue by having several lights of course, but sometimes the better recourse is to just position the light further away to get much more even light.
Thank you Tobias! Really appreciate the feedback. You're totally right. But, if I needed more light for a group, I would simply bring in a bigger light source rather then pulling a small light back. The further the light is from the subject, the harder the light will become. I'll definitely work on making that clearer in the future!
Thanks for the great article Clay! Quick question. What material are you using as the black backdrops/v-flats. The look really big.
Thank you Nicole! I cover all of that in this article: https://fstoppers.com/bts/studio-essential-how-construct-high-quality-v…
Great article. Thank you.
Thanks for reading Terrence!
good.. good
Thanks Eric!
Lighting is something I always struggle with, I know I'm not getting the most out of my shots and don't feel like I have enough time to experiment. All I can do is keep learning and keep improving.
Totally. Keep shooting keep experimenting. It's how I learned everything!
Thanks Devorah! Really appreciate that!
Definitely trying out a light setup like these!
Great article! judging by your portfolio and bts material you're a master of light, my friend! Where did you get the imitation wood floor in the pic under the "Dont forget a Fill" subtitle?
Well you read these articles sometimes just because of one sentence. Like masterclasses - you need to pick up only that one thing to make it worthwhile. I had this sentence here about fill and postprocessing. Nice touch I forget about too often. Kudos.
I don't think the "too far way" image example is a good one. Obviously the photographer is doing a group shot and wants to make sure he minimizes the fall off.
Great article. However, you don’t need baby soft light for a group shot. You just need it soft enough. I’ve done large group shots with a 36” modifier pulled back a little and the light was absolutely fine. It wasn’t very hard at all. I think people get too hung up on having the light really close because they’re told if you have a modifier X size then the furthest you can have it is at that same X distance for the most flattering light. If you stick to that stringent way of thinking, photography gets unnecessarily more difficult.