


by
Andy Day
Could You Edit an Image From Start to Finish While Holding Your Breath?
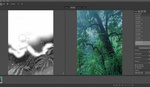
Sometimes, an image comes out of camera so close to perfect that it hardly needs any work. In this video, landscape photographer Thomas Heaton shows how little effort some images require while also reflecting on how much he still needs to learn.