Recent Post Production Articles

How to Recover Skin Texture from Over-Exposed Highlights

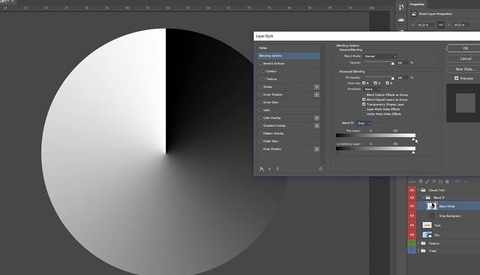
A common issue that we're often faced with when using hard light modifiers such as a beauty dish or open reflector, is that of over-exposed highlights on our subject's forehead, nose and under eye areas, which also results in lost skin texture in those regions. While raw processors offer up the ability to recover highlight detail, this rarely leads to satisfactory results. In this tutorial I'll show you how to recover the texture while leaving the overall luminosity in-tact to produce a well-balanced result.

California In Four Minutes: Explore America's Finest Natural Wonders and Urban Landscapes

The state of California is simply unmatched when it comes to beautiful, picturesque imagery in the United States. As the birthplace and home of timelapse photographer Hal Bergman, it was his goal to compile as much of the visual wonders California has to offer in to a tight four-minutes time. His newest video, aptly titled “California,” combines four years of filming in to a marvelous treat for the eyes that any citizen of the world can appreciate. Beyond the video, Hal also speaks to Fstoppers about the behind-the-scenes work and equipment used in the making.

Another Useful Lightroom Tip Your Mom Never Taught You

Adobe Lightroom is a program full of many different little tips and tricks just waiting to be discovered. In this short video I show you one of my favorites which allows you to apply a selective focus technique to your photo without having to open it in Photoshop. This technique is especially useful if you want to draw your viewers attention somewhere specific in the photo.

Exclusive: RED Has Big Plans To Be Your Still Camera Maker

You read that headline correctly. After making a huge splashes in the motion-capture industry since 2005, Red has big plans to be the only camera system you use on set for both your motion AND still photography needs, and it's closer to being a reality than you would think. Prepare to have your minds blown.

Fstoppers Reviews: RadLab, an All-in-One Ps-Based Editing Platform

I hang out with a lot of wedding photographers and have heard them raving about RadLab, the Photoshop-based editing platform from the guys at Totally Rad!, for the last three-or-so years. The thing they love most about RadLab is the ability to visualize the change a setting will make before applying it — no more Command Z. Over the last couple months I've been using RadLab in tandem with my normal Lr and Ps workflow and have, overall, been very pleased with the results.

Prolost Bespoke Vintage Presets Are Like Instagram Filters For Lightroom

You might have heard of Stu Maschwitz before, possibly from his work on these Red Giant video projects, or perhaps the Plastic Bullet app he made a few years ago. His latest creation is a custom set of presets that integrate with Lightroom, and gives the user a set of vintage photo looks to choose from.

Quick Lightroom Tip - Import Multiple Cards at Same Time

As a wedding photographer I often fill up 3 or 4 memory cards at a wedding and it is important that I get those images downloaded and backed up as soon as possible. Rather than download one card at a time I like to do them all at the same time using multiple card readers. I usually use Photomechanic to do this but recently discovered that it is actually very simple to download multiple cards at the same time in Lightroom as well. I put together this quick video tip to show how.

The advantage to downloading multiple cards at the same time is so one doesn't get...

A Simple and Accurate Way to Match Skin Tones with Selective Color in Photoshop

So it goes without saying that there are a ton of different ways to match skin tones across your subject or between images in Photoshop so it's often just a matter of picking the option that is most convenient or intuitive. Despite the wide array of choices, I seldom see people use the selective color adjustment layer for this task. The beauty of selective color is that it allows us to go off the numbers rather than intuition and achieve an accurate result in little time.

The Top Five Nik Color Efex Pro Filters For Superb Landscape Photos

The Nik Collection by Google carries some of the most powerful image editing applications for photographers. One of these applications, Color Efex Pro, has the ability to dramatically enhance the stories inside your landscape images. Out of the 55 filters available in Color Efex, there are five that I come back to using time and time again. In this article, I will show you what these essential filters are and explain how they make processing my images much less draining.

Make Quick Selections for Basic Compositing on Your iPad Using Photoshop Mix

Though there are other programs out there that say they can quickly cutout objects from the background via masks and leave you with a clean end result, I've tried a few of those programs and they just don't seem to cut it. The process to create these masks also seem very awkward. Now you can quickly create (pretty darn good) masks on your iPad using Photoshop Mix, a mobile offering from Adobe we told you about earlier this year.

How to Quickly and Easily Edit Video in Photoshop CC

Scott Kelby over at KelbyOne recently shared this video showing you a quick and easy way to edit video in Photoshop CC. I personally tend to lean more on the still-photography side of things and am not entirely versed in video post production. This tutorial gives me and photographers / videographer like me a simple option and alternative to the under-equipped iMovie for quick video edits.

Save Yourself Hours - The Most Effective Way To Clean Backgrounds In Photoshop

If you’ve shot in any studio, then you know the rules. Larger studios may require the use of protective booties on a freshly painted cyc wall or some practice the unsaid "no shoes" rule when stepping onto background paper. But, unfortunately, that just doesn’t happen and if the subject is jumping or moving look after look that background is going to get dirty. We all know the pain of re-touching that dirt.

Easily Upload Your Images to 500px via this Lightroom Plugin

500px has taken the world by storm since their launch in 2009. In many ways it's become the new hub for sharing and expoloring work from some of the greatest photographers around. This nifty little pluggin from the developers at 500px (available here) will alow you add one quick step to your workflow to share your images on the site.

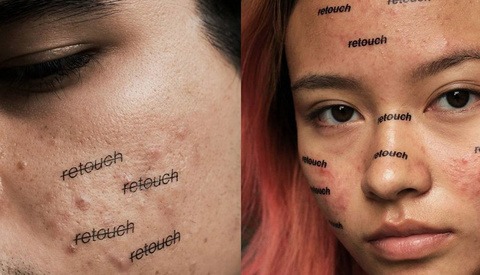
Common Frequency Separation Mistakes Which Will Ruin Your Retouching Results

Almost a year ago I posted The Ultimate Guide To The Frequency Separation Technique article and soon after that I created our Retouching Academy community group for retouchers and photographers who retouch their own work. We have been seeing a lot of before & after images posted there by artists of all levels from complete beginners to seasoned pros.

And in there we all have been witnessing that one of the most abused and misused techniques by those who work with images of people is Frequency Separation (FS). Mainly by beginners, of course....

A Makeup Tip I Wish Someone Had Told Me When I Started Photography

When I began photography I didn’t understand the importance of lighting and the difference makeup has on an image. Looking back, if I would have first understood and attempted to master the techniques behind makeup, I would have understood the proper way to light my subjects when photographing them.

Full Tutorial for a Creative Grunge Retouch

Glyn Dewis goes through his process of retouching a creative grunge image from start to finish, showing how he uses Photoshop as well as plugins from Topaz and the Google Nik Collection. This video is great for some quick retouching tips which includes a simple lighting effect using paint brush and is some excellent inspiration for filters and effects to add to your images. As always, Dewis shows you how to work non destructively so that you are always able to go back and tweak your many filters and layers.

Optimizing Photos for Maximum Quality and Minimum Size

What's the best way to optimize photos so that I can deliver quality to my clients while reducing the file size for faster uploads into the cloud? This has been a question I’ve been thinking about for sometime. I have tinkered with settings in Lightroom to try and find the right export recipe but it wasn’t till another photographer told me about JpegMini that I finally felt I had the solution. Using image optimization technology they developed, JpegMini was able to deliver maximum quality at minimum file size. I ran it through some tests and here are my results.

Microsoft Hyperlapse Project Aims to Make First-Person Videos Enjoyable at Last

First-person cameras, such as the ubiquitous GoPro, have been filming hours of footage from their owner’s journeys for years now. These lengthy uncut videos don’t hold much interest to most people, but a team of Microsoft Researchers are aiming to change that by using some remarkable technology they hope to release as part of an upcoming app.

New Free Software Allows Real 3D Manipulation Of A Single Image

Artists all over the world use Photoshop to retouch images and for graphic design. Because of that, Photoshop has become the #1 image editing software out there. We know Photoshop has put a lot more implementation into its 3D capabilities, but that's not what Photoshop is really for and it still has a long way to go. So it's great news that a group of Researchers at Carnegie Mellon and University of California, Berkeley have come out with software that allows for full 3D manipulation of objects in a photograph.

How to Properly Use the Liquify Tool in Photoshop

Liquify gets a bad rap. Its misuse accounts for a pretty alarming number of Photoshop disasters. And although it is easy to learn, it does take a great deal of time and energy to master. Luckily, Aaron Nace over at Phlearn is here to help. Known primarily as the "digital plastic surgeon" of Photoshop, the liquify tool can also be applied to tremendous effect when it comes to making clothes fit to perfection - and that's exactly what this video shows.

The "Cutting Edge Editing & Post Production Tour" Review

The premise for the Cutting Edge Tour headed up by Adam Epstein, five year veteran video editor and post production guru for Saturday Night Live, was a tricky one. I know because I spent a few days bouncing ideas around with him and looking at how to structure the thing. This review will set out specifically what you will (and won’t) find in the workshop.

Move Your Image Library From Aperture to Lightroom With Just A Few Clicks

With the announcement of Aperture's retirement, many of Apple's software users are seeking a new home for their image libraries. One of the most obvious choices is Adobe's Photoshop Lightroom. But moving those images from Aperture to Lightroom can be a little tricky. A new app has made it out of Beta and hit the app store that may provide an easier solution.

A Recommended Way to Reduce Noise in Photoshop

In this Adobe Photoshop Playbook video, Bryan O'Neil Hughes suggests a variety of options to help you tackle noise when processing your photographs. Due to the improvement of pixel quality, noise isn't usually so much of an issue. However, it still can be a problem especially in your low light images.

The Cinematic Look – How To Make Your Photographs Look Like Films

I recently noticed that a handful of photographers were producing images that had a look as if they were stills captured from films. A couple of the most well known photographers of this genre are based here in New York so I got them together and challenged them to not only come up with a dynamic personal project on the fly incorporating this cinematic look, but to share with us how it is achieved. Read on to find out how it all went down...

The Ultimate Guide to Getting Started with Capture One Pro

Over the years, Capture One has evolved tremendously in its feature set, and has steadily become one of - or arguably the best - raw processor available. Despite all it's advantages and praises, many remain hesitant to adopt it, largely due to its seeming complexity and the intimidation factor associated with a truly professional tool. In this tutorial I'll be guiding you through the key aspects of Capture One version 12, and demonstrating that it's actually quite intuitive and straightforward to use.

Take These Four Important Steps Before You Outsource Your Printing

Professional-quality photo printers and paper are expensive. It can be difficult to justify the steep price of the machine and upkeep for most photographers who shoot as a hobbyist or even a starting professional. Outsourcing your printing needs to a pro photo lab alleviates the cost, but there are some inherent complications in not being able to print from home. These four helpful steps will minimize the disconnect when sending out your images to the lab.

New To Photoshop? Watch This

Opening Photoshop for the first time can be pretty overwhelming. But whether you're new, relatively new or looking for a good refresher on the basics, Aaron Nace at Phlearn has assembled a can't-miss, three-part series on the need-to-know elements of Photoshop. In part one, the very basics are covered: opening and saving a file, Photoshop preferences, keyboard shortcuts, color space, basic saving for web, using a tablet, tools and layer masks. In parts two and three, things get a little more complex...

Evolution Of Me - 5 Investments That Changed My Career Forever

I have only been shooting photography for a little over 3 years now. Things have progressed so quickly during that period of time that I haven't really had the chance to look back at the evolution of my photography. I had to think thing long and hard about the investments I have made over the 3 years and the things that really changed the game for me.

From Media Access To Average User - How My Opinion of Adobe Has Changed

Being a member of the media has a set number of luxuries. One of those being, working with Adobe and getting early access of products, and exclusive news. Thanks to Adobe, I used Creative Cloud for an entire year free by attending a media exclusive Adobe event back in the summer of 2013. However, since I've started paying for it a month ago, my frustrations have hit an all time high.

How to Make Stylized Film Titles for Your Next Video

The guys from Film Riot catch ‘Guy Ritchie Disease’ and in the process teach you how to create the "Guy Ritchie" freeze frame effect. Whether you need an awesome intro title for your film or even a great effect for your own behind the scenes photography vlog, this Film riot video shows you how to create it in Adobe After Effects. If you’re more comfortable in Photoshop, you can put it together in there and then animate it in After Effects.

How To Photograph And Light Real Estate At Dusk On A Budget

Last year we teamed up with Mike Kelley to produce the 7+ hour tutorial: How To Photograph Real Estate, Architecture and Interiors. We were fearful that Mike's fancy equipment would be discouraging to new photographers so we asked Mike if he could create a signature image with much cheaper gear. Mike shot an incredible, world class image with the original Canon Rebel and kit lens and only a few accessories.

Challenge: How Much Retouching Can You Finish In 6 Minutes?

Jeff Rojas is challenging you to see just how much retouching you can finish in 6 minutes. Dubbed the Dirty Edit Challenge, Jeff explains that sometimes you don't need to go overboard for certain clients. Maybe you're not getting paid enough, or maybe you have a ton of images that need retouching. In either situation, this is a great way to see what your strengths and weaknesses are in Photoshop.

Fstoppers Review Of The Panasonic Lumix GH4: Is It Ready For Professional Use?

In short, no it is not. But a few minor dealbreakers are all that stand between leaving this camera on the shelf, and making it best digital camera in its class.

After nearly a month of capturing video, stills, and timelapse media with the Panasonic GH4, I laughed, I cried, and I almost threw it off a mountain. At times it was a joy to shoot with, and other times it wouldn’t even power on with a full battery. I’ll give you a complete, unbiased rundown in my full review, complete with video samples.

Everything You Need to Know About Auto Exposure Bracketing

What is Auto Exposure Bracketing? (AEB) is the setting on many DSLR cameras which allows you to take three different exposed images in quick succession. Often one image is under exposed, the second is mid range and the last is over exposed. AEB is commonly used for creating HDR (High Dynamic Range) images or giving you a range of options so that you are able to get the correct exposure in post processing.

Glyn Dewis Shows You How to Save an Almost Unusable Image

In this valuable tutorial Glyn Dewis takes a quick snapshot and shows you how to pull detail from highlights and shadows to make it a beautiful image. Dewis mentions some great workflow tips and tricks in Adobe Lightroom as well as how to bring your image over, non destructively, to Photoshop camera raw.

Photography Compositing Insanity, A Dress Made Of Hands

I ran across the incredibly imaginative portfolio of John Flury a few weeks ago. When I viewed his image "Provincial Uprising" where a womans dress was made of human hands I couldn't figure out how it was made.

Phlearn Shows You How to Create an Artistic Double Exposure in Photoshop

In this brilliant tutorial from Phlearn, Aaron Nace shows you how to create an artistic, composite image to replicate the double exposure effect. Despite being a little complex, the instruction is easy to follow. Nace’s great tips include: finding an appropriate blending mode, using detailed masking and grouping as well as using the gradient tool to add that extra something to your image.

Nikon's New Capture NX-D Software Available Today for Free

We said it was coming, and now it's here: Nikon Capture NX-D is available for download completely free of charge. If you're a Nikon shooter just starting out and don't have anyting you love for RAW processing, it certainly doesn't hurt to give this a try.

Tutorial: Create Beautiful Double Exposures Quickly in Photoshop

Last year, photographer duo Dylan Howell and Sara Byrne (of Dylan and Sara Photography) posted an awesome video showing you how to create beautiful double-exposure photos in-camera, a technique popular in fine art, portrait, and wedding photography. I just stumbled across this awesome tutorial by event and wedding photographer Andrew Klokow showing you how to replicate this cool look quickly and fairly easily in Photoshop.

Watch Amazing Retoucher Marina Dean-Francis Speed Retouch

Last week, we featured an interview with the awesomely talented retoucher and photographer Marina Dean-Francis. This week, she's shared a video with Fstoppers showing her retouching on a hair and beauty image. Although the video has been sped up tremendously, it's not hard to see that there aren't many quick tricks in play here. It's no secret that maybe the greatest skill in retouching is patience.

Pay close enough attention, and there are some very useful tips in this video - my personal favorite comes in around the 2:30 mark and is a great way to add highlights on...

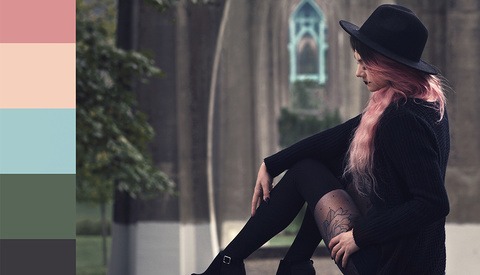
Recreate the Look of Your Favourite Image by Matching and Toning Colour in Photoshop

Inspiration spurs creativity and it is often you find a photograph or artist that influences your practice. In this Photoshop tutorial Ben Secret helps you recreate the look and feel of an image by matching contrast, tone and saturation. With these brilliant tips get a handle on colour and tone through imitation, but then have fun adding your own unique style.

Light Painting a Landscape in Lightroom

Watch this video where Glyn Dewis talks about his method to shoot landscapes, and his use of various techniques to develop the image in Lightroom with some fine tuning in Photoshop.

BTS: How This Beautiful Slow-Mo Film of a House Set on Fire Was Made

Slow motion is, certainly, one of the most beautiful cinematic inventions of all time. It can show us so many things that are not normally visible and can make any "normal" scene look magical and unique. For the past few years the slow motion technologies have continued to improve, and just last year the Phantom Flex4K Digital Cinema Camera was announced introducing some groundbreaking slow motion abilities like shooting at 1,000fps at at 4K resolution. Shortly after its release, Director Brendan Bellomo and cinematographer Greg Wilson got their hands on the camera and took it for a test and created this beautiful video called "Let Me Know When You See Fire."

Create Beautiful Monochrome Images Quickly in Photoshop

Friend of the Fstoppers Dave Kai-Piper recently shared this great little tutorial showing you exactly how he creates his beautiful monochrome images in a clever little process that takes only a couple minutes.

Simple Tutorial to Understand Curves in Photoshop & Camera Raw

Curves are by far, the most powerful and versatile color and tone manipulator in Photoshop. Many photographers like Erik Almas & Brooke Shaden swear by it, and is a major part of their workflow. Curves can be very intimidating at first, but once you truly understand how to use them, they will substitute the sliders of Brightness/Contrast, Color Balance, Shadow/Highlights etc. that you are used to.

Top 10 Most Effective Movie Editing Moments of All Time

After watching a great film, it is rare that we give conscious credit to the editing (which is actually a silent compliment to the editors). However, how the film was cut creates most of the powerful feelings we get while watching and is a major contributor to our final thoughts on a film. CineFix has put together what they believe to be the top 10 most effective editing moments of all time, and it's certainly worth noting the editing mastery at work.

Nikon's New Capture NX-D Software to Be Released for Free in One Week

While the beta has been out since February and can still be downloaded here, according to a June 26th press release, Nikon will be releasing its new Capture NX-D software July 15th for free. The previous version of Capture NX-2 still goes for $140, so it's nice to see more value added to Nikon's products for us Nikonians out there.

Phlearn Shows You How to Change Hair Colour in Photoshop

In this great tutorial, Aaron Nace from Phlearn teaches you how to change hair color in Photoshop. He shows the trick to changing red hair to brown, black and blonde and this video also gives great insight into and cause for practicing your skills with blending modes as well as selective color and levels adjustment layers.

How to Expertly Color Grade Images by Mastering Luminance Masks

One of the most versatile and powerful secrets of Photoshop is the luminance mask. Similar to a channel mask that allows you to select very precise parts of your image based on color, the luminance mask allows you to select parts of your image based on tonal range. Using Photoshop to select those tonal ranges for you, you can quickly and effortlessly make very specific color and contrast adjustments to color grade like a pro.