
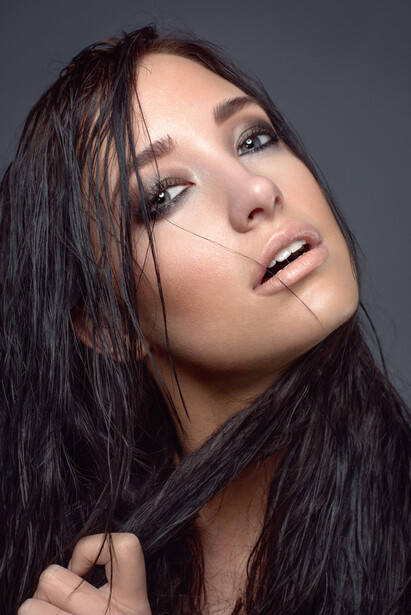
In the final part of the Dramatic Beauty Portrait Tutorial, we will look at how I do my Black and White conversion. This image is a dramatic image so it calls for a punchy and high-contrast black and white conversion. In this tutorial, I will show you how I stack blending modes and adjustment layers to get my image exactly where I want it. You can follow these steps in your own images or use the techniques and customize them for your own use. In the video you will also see how to use layer masks to create targeted adjustments for your high-contrast black and white portraits.
Step 1: Adding Contrast With Blending Modes
The first step in my black and white conversion is to bump contrasting by using adjustment layers and blending modes. First I like to add a "Black and White" Adjustment Layer in Photoshop. In the "Properties" window for the Black and White adjustment you can select different presets that will give your image slightly different looks. In the video above I show examples of these presets and how they adjust your image.
But in this step we aren't looking to go to black and white just yet, we are using that Black and White Adjustment layer to add contrast - in order to do so I will change the blending mode of that layer from "Normal" to "Soft Light". This will get your image back into color but with way too much contrast, so pull back the effect by adjusting your opacity. Usually somewhere between 5% to 20% is about right, but it does vary for every image.
In this particular image, I chose to do one "Black and White" adjustment layer that effects the entire image and then another that only adds contrast to the subjects face. If you haven't used "Selective Adjustments" watch the video to see how to utilize the mask associated with that adjustment layer to paint the areas you want to be affected.
Step 2: Adjusting Contrast With Levels
The next step is a standard finishing step that I also show in my 5 Final Steps To Finishing Any Retouch Video. Its simply to add a Levels adjustment layer to get the contrast in your image where you would like it. In the beginning of our retouching process, we usually flatten our image out so that we have the most visible information possible. Flattening the image is not usually visually appealing but allows for a better end result - even though we add the contrast back in at the end of our retouching process.
Also at this point you can add a "Selective Adjustment". Just like in step 1, you can add a 2nd adjustment layer, but use the mask to select only certain parts of your image. In this image, I again target the subjects face to bump the contrast once again.
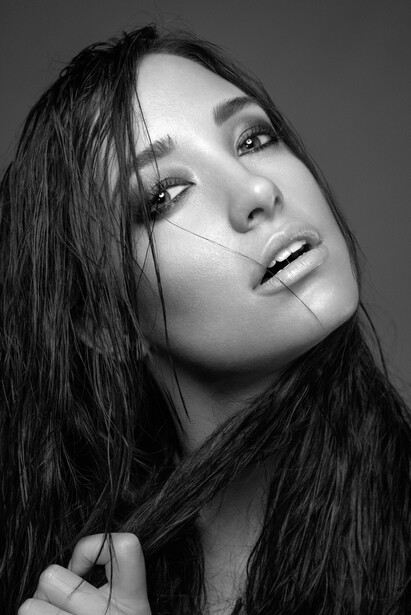
Step 3: Converting to Black and White
Keep in mind here that when you add a Black and White Adjustment Layer you are altering how the values in your image appear. In this particular image I decided to simply use a "Hue and Saturation" Adjustment and take the saturation of the image down to "0". This give an exact conversion of values and doesn't alter the values in your image. Since I've already pushed my image where I want it in the first step I don't need to change it again. However, if you wanted to use Black and White instead that's perfectly fine here. At the end of the day you should be seasoning to taste, so to speak.
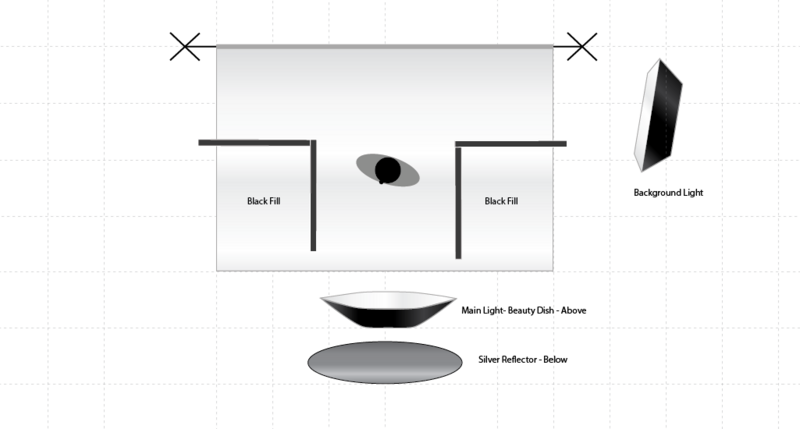
Part 1: Lighting Setup and Gear List
Part 2: Preparing and Pre-Editing
Also, remember to Subscribe to my channel on YouTube to get updates on future videos.
2 Comments
Love this series!
Thanks Marek - I'm glad to hear it!