Recent Photoshop Articles

Four Tips to Cut Your Dodging and Burning Time in Half

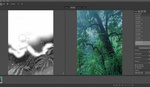
Dodging and burning for cleaning skin is very common amongst high-end retouchers and for a reason: when mastered, it gives you natural, yet almost perfect results. The downside of the technique is that it can eat up a lot of time. When I say a lot of time, I mean up to a couple of hours for a single image, depending on the problems that need corrections. While spending this much time on big projects or perhaps on personal projects is conceivable, for someone that shoots portraits every day and has to retouch quickly, this is simply not viable. A couple of tricks exist to help you go faster, while retaining a high quality and natural-looking image. I have listed four of them here with the hope that they will save you as much time as they do for me.

How This Picture Was Taken - "The Iris of God"

It's always impressive to see a subject that's shot so often used in a new and creative way. This conceptual shoot of the Milky Way by George Malamidis was beautifully conceived and executed. George picked two possible names for the image, both of which perfectly describe the outcome, "The Iris of God" or "The Peacock Milkyway." Want to know how he got the shot?

Retouching Monday - Submit Your Image to be Retouched for Free!

This week we get to look at yet another style of retouch, a sports styled image. Each genre, weather it be fashion, beauty, landscape, or sports is going to have different parameters to follow and slightly different goals to achieve. With a female athlete it can be particularly tricky, because it can be challenging to find the line between doing to much or not enough especially as it come to skin retouching. In this post we will look at some of the steps and tricks used in this particular image that can be applied to your own sport retouch. We will also take a look at what else can be done to this image.

The New Apple iPad Pro May Change The Photo Retouching World

As I am writing this Apple is having a press conference about their new products. The Apple Watch is getting a software update, the Apple TV is getting a total overhaul, the iPhone is all new (and can finally shoot 4k video), but potentially the most exciting news for photographers is the Apple iPad Pro.

The Monday Retouch - How to Retouch Landscapes - Submit Your Image to Be Retouched!

This week's winning image comes from Photographer Daniel Nordholm. It's a stunning landscape image that he captured in Lofoten, a beautiful archipelago in Norway. I was very excited to break from my norm of beauty and fashion retouching to tackle and share a landscape retouch. Many of the techniques and the workflow of a landscape can be very different from portrait retouching, while the philosophy can be quite the same. In this article, you will see the full retouch of the image in the short two-minute video. In all, the retouch took about an hour. I will also share some specific techniques for landscape editing that you can use in your images as well.

Did Photo Retouchers Photoshop Jennifer Lawrence's Face Too Much In New Dior Ad?

Oh the world of high end retouching. This week cosmetic company Dior released a new video and ad campaign featuring their hot spokeswoman, Jennifer Lawrence. With a not so subtle nod to Sharon Stone in Basic Instinct, this new lipstick commercial isn't so bad upon first watch. Social media has gone ablaze however once screen grabs from the video have been making their way across the internet. Where are Jennifer's eyelids! We have the behind the scenes video to see where things went wrong.

The Monday Retouch Episode 3 - Submit Your Image To Be Retouched For Free

It's Monday so it's time for another speed retouch and episode of Retouching Mondays. This week image comes courtesy of last weeks winner, Ben Scott. If you would like me to retouch your image and send you back the full-high res final image, all you have to do is post your image in the comments and wait to hear back. I will email the winner on Thursday morning, so post your newest favorite image that you want retouched. It can be any genre, beauty, fashion, landscape, wedding! I'll record the retouching and send you the final image to use as you wish! Take a look at the speed retouch of Ben's image and let me know in the comments if you have any questions, I'm happy to answer them. Now lets take a look at the before and after and the challenges for this week's Monday Retouch.

Serif Releases Free 10 Day Trial for Affinity Photo

A couple of weeks ago, Serif released its powerful photo editing software called Affinity Photo. This Adobe Photoshop competitor has since been downloaded by numbers of users and has already seen a couple of improvement through an update. Its price and its speed are probably two of the most notable advantages the software offers over Photoshop. While the reviews are slowly making their way to different websites, many photographers and retouchers seem to be wondering if the software is worth its price.

How To Enhance Freckles with Photoshop

In my recent Natural Light Tutorial with RGGEDU, I went through every aspect of natural light photography and retouching... Or so I thought. During a shoot this week, I realized I missed one thing: enhancing freckles with Photoshop. In this article I will show a simple method to making those freckles pop.

Adobe's Mobile Photoshop Application will be Released in October

Last May, Adobe gave the world a sneak peek of their forthcoming mobile retouching platform. While the video only showed off modest implementations of the liquifiy, paint, and vignette tools, it's clear that Adobe and their army of software engineers have been hard at work beefing up their iPhone and iPad apps.

One of the World's Best Compositers Reveals His Complete Workflow and Retouching Techniques

Erik Almas, one of the best commercial composite photographers, has recently teamed up with the team at PRO EDU to create a fully comprehensive tutorial on his complete shooting and retouching process. In this video Almas takes us through an hour-long tutorial, retouching and completing the backplate for one of his tutorial images. I'm always impressed when photographers and retouchers, especially those at the top of our industry, open the doors and reveal their entire process and Almas has done no less here.

The Monday Retouch: Episode 2

It's Monday morning and that means another completed retouch and time to submit your image for next week. We had more amazing submissions last week and here is the winner! In this post, you will see the SOOC image compared to the retouched image and I will discuss the particular challenges and the direction I decided to go with the photo. You can also watch the entire retouch in the video. And once again, you can post any image of yours that you would like and it may be chosen to be retouched for free and delivered to you in full-res to do with what you'd like.

Why You Should Stop Contouring in Post

Natural-looking images are making a comeback. If you look at recent issues of big magazines, you will see that makeup is often a nude with some shine to it, retouching is less "doll like," and even simple 1-light setups seem to be the standard. Some people will argue that it has been like this for quite some time. It is true, but I find that retouching is more flagrant than before. Even well known high-end retouchers seem to leave more imperfections in their images than a year ago.

5 Best Tips to Set up Your Wacom Tablet for Retouching in Photoshop

I personally have never used a Wacom tablet or stylus in my life. They always seemed like the most useful post-processing tool ever, but I never bit the bullet and tested the waters. However, after filming Elia Locardi edit over 40 images for his "Photographing the World" landscape series, I am confident enough to finally give it a try myself. Luckily my good friends over at Phlearn have laid out five of the most useful tips for making your Wacom tablet easy to use.

Learn How to Easily Remove Human Traffic from Your Photos

Have you ever wanted to photograph a location only to have a constant stream of people coming and going? Trying to capture the the front of a busy building can be truly frustrating. Lucky for you Greg Benz knows your pain and he has a quick and easy solution to help you get the shot you've been waiting for.

The Monday Retouch - Submit Your Images For Next Week !

Its Monday so as promised here is the completed retouch for last weeks winning submission by Mitchell Flores. For only being the first week of this regular segment we had an great number of submission and it was hard picking, can't wait to see what you guys submit this week. In this post I'll go over some of the steps of the retouching process and talk about the challenges for this particular image. If you would like your image to be selected for next week, post your low-res image in the comments below by Wednesday of this week.

Secret White Balance Trick for Photoshop

There are many ways to adjust white balance. From adjusting it in camera, using a grey card, or adjusting it in post, it really depends on the situation you are in and your personal preference. Personally, I always shoot RAW and keep the white balance setting on my camera on auto almost all of the time. This way, I don’t have to fiddle with it in camera and the camera gets it right most of the time. If by some chance the camera does get it wrong, I will take it off the auto setting and find the setting that works best for the light that I am it, but still knowing that because I am shooting RAW, I can always make the adjustments in Lightroom or camera RAW.
Optimize Your Photoshop Workspace to Speed up Your Retouching

When using Photoshop, I find myself zooming in and out very often. While this might not be a massive loss of time, it still is one, especially when doing some local dodge & burn. I recently found a technique that doesn't require me to zoom anymore. I can now work on my file with multiple views at once in Photoshop. How is this possible? It is only a very simple option in Photoshop, nothing as crazy as Inception.

Everything You Need to Know About Capturing Sharp Photographs in Any Situation

Some photographers like that soft, ethereal feel as they specifically seek out types of plastic to stick in front of the lens, or even go so far as to buy defocus control lenses and LensBabies that will allow them to distort an otherwise true image. That has its value. But this isn’t for that. This is the new go-to guide for absolutely everything to know about how to get your images to be tack sharp. Get ready to dive in: this is a no-questions-left-behind study on sharpness.

Submit Your Image To Get Retouched For Free This Week!

I'm excited to announce a new weekly segment, where you the Fstoppers community can submit your favorite image to be edited and retouched by me, Lance Nicoll. Post an image you recently shot, that hasn't been retouched yet, in the comments below. On Thursday I will retouch it an post the recording of the entire process! If you guys love it, I will continue to do this every week! – And maybe in the future even do it as a Live Retouch with Q&A. The rules are as listed below. Really excited to see everyone's submissions. Submit your image by Wednesday at Midnight to be selected.

5 Photoshop Tricks You Don't Know (And Why Photoshop is So Damn Amazing)

You know you've "made it" when your brand/product becomes a verb. With 25 years of history Photoshop has done exactly that and has become the undisputed champion of the photo manipulation/editing/post production game. I've been using Photoshop since version 1.0 back in 1990 (first as a tinkerer, then as a design QCM and finally as a photographer/retoucher) but despite my long relationship with Photoshop I still don't consider myself as having mastered it.

Madman Chris Pratt Opens a Photoshop Can of Worms

It is nothing new for celebrities to call on their fans to have a little fun with Photoshop. Our own Lee Morris challenged all of you a few months back with his many stages of beardedness. But when you are movie star Chris Pratt and you are known for your quirky, fast, often in-your-face style of humor, you should probably expect the internet to get a little weird with your request.

A 20 Second Behind-the-Scenes Video Detailing Erik Johansson's Soundscapes

Berlin-based photographer/retoucher Erik Johansson creates wildly imaginative and often surreal images that has us posting on his work time and time again. Erik's images have been defined as a complex combination of his own photographs that captures ideas rather than moments. As impressive as his finals are, it was this simple 20 second video that caught my attention this time. You get a pretty good idea of Erik's technical process and if you're anything like me, you'll be motivated to create an Erik Johansson inspired piece of your own.

Here is What Famous People Would Look Like If You Averaged 50 Photos from Google

Have you ever wondered what Donald Trump would look like if you combined 50 random photos of him and averaged them together? That's exactly what Reddit user Dwainosaur did with his latest photo/data mashup. Using commonly found images on Google, these composites of celebrities like Barack Obama, Kayne West, Bill Murray, and Brad Pitt almost look like pencil drawings. The results are pretty eerie and give a pretty good idea what each of these well known people would look like as a ghost.

The Quick and Not Too Dirty Way to Clean Skin in Photoshop

Dodge and burn, frequency separation, and other techniques used by high-end retouchers are great but time-consuming. Shooting and retouching weddings, as well as fashion and beauty, I sometimes find myself spending way too much time on wedding retouching. Being used to cleaning skin with dodge and burn for beauty, I tend to do the same with weddings. Which, as you can guess, is not very profitable. The same thing goes for proofing portrait sessions. I like to give lightly retouched proof images instead of pure raw files. So for weddings and portraits proofs I had to come up with a quick way to clean skin without making my images look too bad. Here is how I do it.

Why You Should Thank Adobe for Creating Photoshop

A long time ago, in a galaxy far away, Adobe Photoshop had yet to be created. OK, I am being a bit dramatic, but Adobe is celebrating 25 years of Photoshop. Watch this video to truly appreciate how easy we have it in our digital age.

Using the Liquify Tool in a Non-Destructive Way

One of the benefits of using layers in Photoshop is to edit pictures in a non-destructive way. However, there are a couple of techniques and filters that will require you to flatten a file or create a merged layer. The liquify tool is one of them. To use it, you must create a merged layer of the area you want to edit. Sometimes it means a merged layer of the whole image. In this article, I will show how to avoid this problem using a simple, yet very powerful tool Photoshop offers. We are going to see how to use the liquify tool in a more efficient way than on a merged layer. This way you will be able to go back into your retouching process without losing anything and even edit your liquify.

Speed up Your Retouching with Six Easy Tips

In dealing with bigger paid jobs lately, I've had to find ways to refine my retouching workflow. I used to do most of my skin cleaning by dodging and burning problem areas. It then had to be color-corrected of course. Negative dodge and burn gives you excellent results when mastered, but it eats up a lot of time. For some clients or projects, justifying 1-3 hours of postproduction per image is simply not possible. Being confronted more and more with this real-world issue, I have taken the time to look into my workflow and see how I could spend less time in front of my computer. Here are some of the things I have changed as well as a few tips I could give anyone facing similar issues.

A Quick and Dirty Way to Get Rid of That Frizzy Hair

Sometimes you need to get rid of that frizzy wind-blown hair but you don’t have the time to mess with cloning and blending. This can be even more difficult and time consuming with more complicated backgrounds that have gradients in them. I’m here to show you my quick and dirty way to get rid of those flyaways.

Adobe Finally Updates Creative Cloud Desktop Client to Solve Infuriating Pop-Up Issue

For those with Creative Cloud subscriptions, you may have been rudely and often interrupted by Adobe's Creative Cloud desktop client popping up in your menu taskbar (a very similar phenomenon occurred with both Mac and PC platforms). For such an annoying issue, it took Adobe quite some time to come to our rescue, but we can finally celebrate a new kind of independence. Alas, my migraines are finally fading — CC now politely stays where it belongs. That is all. Make sure you update. Have a nice day.