Recent Post Production Articles

Two Tools to Improve Your Photo Editing Efficiency

Have you ever kept track of the amount of time that you spend editing each month? I was shocked the first time that I did. Realizing how much of my time that editing was consuming caused me to search out ways to be more efficient, and this is what I found.

How to Change White Into Any Color in Photoshop

Being able to change colors in post can give you a lot of creative control and save a headache when shooting. One difficulty, however, is changing anything that's white. In this video, you'll learn you how to do that quickly and easily.

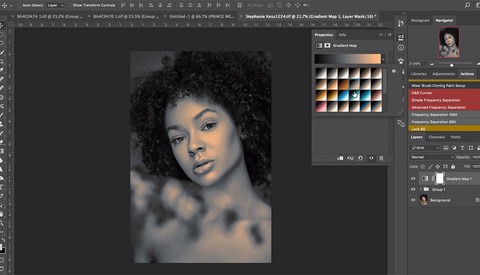
How to Give Your Portraits Beautiful, Rich Skin Tones

How skin is processed in the editing phase of your portrait can make or break the image. One easy and effective tool is Gradient Maps, as shown by Prince Meyson in this useful video tutorial.

Three Common Misconceptions About Camera Raw Smart Objects in Photoshop

Smart Objects in Photoshop are a fantastic tool to avoid working in a destructive fashion when filters, such as Camera Raw, need to be used in the retouching process. In this video, Greg Benz clarifies three common misconceptions to save you useless worries or precious time.

Fstoppers Reviews Opal Opacity Plugin for Lightroom

Often when going through a set of images via Lightroom, we use a preset we like, export the images, and then tone back some of the color or "effect" from the preset, once in Photoshop. There has always been a need for a way to easily dial back a preset and now there is.

Alien Skin Software Winter Sale

Alien Skin Software are currently having a winter sale through to the 20th of this month, with savings of 20 percent or more on all their products.

How to Remove Large Objects in Photoshop

Have you ever tried to remove an object from a photo, but just couldn't get it to look right, whether it be because of the lighting, color, or actual selection? This tutorial provides a handful of tips for perfectly removing objects in Photoshop.

Using ACDSee Pro on iOS for Advanced Color Grading

In a mobile world filled with an endless selection of preset filters, there are surprisingly few options to employ more creative color grading that is driven by specific choice rather than by simply perusing a gallery of presets. ACDSee Pro for iOS is one of the few apps that look to bridge this gap with an array of powerful color grading tools that emulate the color grading freedom of desktop editing.

How to Make Your Cityscapes More Dramatic Using Capture One

Baber Afzal is well known for his dramatic looking fine art cityscape and landscape pictures. In this 12-minute long tutorial, he’ll show you how to achieve the same look on your pictures by taking you through one of his edits in Capture One and giving precious tips along the way.

Fstoppers Reviews the Acepen 2150, a 21-Inch Pen Display That Costs Less Than $500

When it comes to retouching as best as possible, a graphics tablet is crucial. It gives more control and allows for fine adjustments that are extremely hard to get with a mouse or trackpad. I’ve been a longtime Wacom Intuos Pro user and always loved it. However, I’ve always wondered what it was like to edit on a screen. Recently, I've had the opportunity to try a couple of these including the Acepen 2150, a cheap alternative to the Wacom Cintiq line. In this review, I’ll explain what I loved about it but also tell you why retouching directly on a screen is not for everyone.

The Photoshop Filter You Need to Start Using Right Now

Hidden within the heart of Adobe Photoshop is a filter that many are familiar with, yet most fail to use to its full potential. It is a powerful, all encompassing workhorse, and its abilities may just change the way you approach your Photoshop edits. Ladies and gentlemen, let's explore the often ignored Camera Raw Filter.

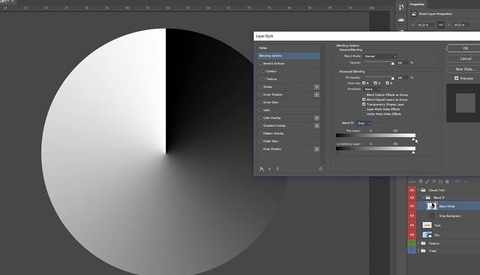
How to Use the ‘Blend If’ Feature Effectively in Photoshop

The “Blend If” function in Photoshop is usually skipped by most photographers and retouchers. However, it is an efficient color channel-based tool for quick masking and creating smooth transitions when blending different elements. While it is a technique commonly used by architectural photographers for quick sky replacement or smoothing out the shadows, it can be implemented for different purposes in Photoshop and can save great amount of time.

Take Advantage of These Advanced Brush Tool Settings in Photoshop and Lightroom

At the core of any image editor is the brush tool, and although many of us don't give it a second thought, it really is one of the most important features to master. Density, opacity, hardness, and flow all affect how the brush works in very different ways. Make sure you know the difference between these settings so you can work smarter when editing your images.

Frequency Separation Made Easy With ACDSee Photo Studio Ultimate 2018

Frequency separation has long been a popular technique for skin retouching. However, for a lot of photographers new to photo editing, beauty retouching, and ACDSee, it can seem like a very difficult process. Within ACDSee Photo Studio Ultimate 2018, the process has been made easier with the addition of an automated frequency separation tool.

The Ultimate Tutorial on Product Photography

Brian Rodgers Jr. has become the most popular and highly rated product photographer on Fstoppers, and today we are releasing his full-length product photography tutorial, “The Hero Shot.”

Hands-On First Look with a New Lightroom Update that Promises Faster Speeds

Adobe touted much faster speeds with the release of Lightroom Classic CC (essentially, Lightroom 7). However, results seemed inconsistent. Even so, these early inconsistencies seem to have gone away with subsequent updates and bug fixes. And thankfully, Adobe will soon release another update to Lightroom that promises even better speed increases. We’ve been playing around with it for a few days to get a better idea of what to expect.

Life After Apple: Month One

As I wrote about before, I have always been the biggest Apple fan anyone’s ever seen. Especially with my background in graphic design, it only made sense to use an Apple computer. Naturally, as I transitioned into being a photographer, I continued to use nothing but Apple computers, and I do still maintain that they make an excellent, high-quality product. That said, it does come at a price, a rather hefty price that made me question things.

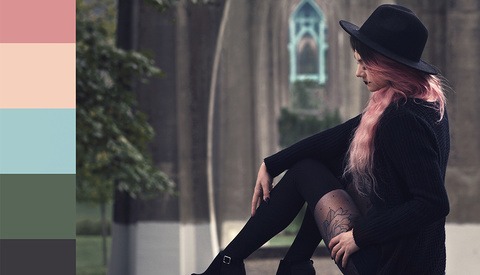
How Color Theory Improves Your Photography and Retouching

The wrong elements of color can disrupt the harmony of photographs and distract the viewer from the story you’re trying to tell. When we’re deliberate though, we can use color theory while planning the components of our photos and use color grading to allow us to create compelling images that add emotion to help us create a story. Dynamic images are created through complementary colors that develop harmony in wardrobe and location, lighting, and mood. Fortunately, there are numerous resources to understanding and implementing color.

How to Create the Droste Effect in Photoshop

Have you seen those recursive photos where the image seems to continue in an endless loop, mostly commonly found where the subject is holding a frame or photos and inside that areas is the same photo appears in itself repeatedly? This is known as the Droste effect, and it might be a lot simpler to achieve than you thought.

iPhone Vs. Pro Camera Challenge

Patrick and I decided to create a video series where we compete to see who can come up with the best image based on a set of randomly chosen rules. This week, one of us got to use an iPhone and the other had the entire studio at their disposal.

Create a Water Reflection With Photoshop

When shooting landscape, I’m sure there have been times when you wished you had a wider lens to capture the reflection of the view in a lake. Don’t be full of regret, and try to look for another solution. One way could be to capture multiple shots and the other to rely on Photoshop. In this article, the guys at Tech Genie will show you how you can create a stretch of water from scratch.

Fstoppers Reviews Alien Skin Exposure X3

Alien Skin, the makers of one of the most popular Photoshop plug-ins for photographers, released the latest iteration of their standalone raw photo editor in November 2017. Back in June 2017, Fstoppers reviewed Exposure X2 and found it to be a realistic alternative for those who can’t justify the subscription for Adobe or Capture One Pro’s more expensive offerings. In this review, I’ll deliver an overview of the tools available, and give my own two cents on the raw photo editor.

How I Got the Shot Even While I Was Screwing Up

Ever have one of those shoots that seems to never go as planned? Ever have fail after fail but you have to maintain your focus just for the client? This can happen with underwater sessions in a matter of minutes. When you are dealing with something as beautiful but chaotic as water, knowing you have the tools to fix the issues will help regain your sanity.

Drugstore Chain CVS Health to Ban Retouched Images

Drugstore chain CVS Health announced today that it will stop using photo manipulation in the promotional images for its store-brand makeup and will require all other companies to follow suit by 2020. Companies that continue to use manipulated imagery will have their adverts labeled by CVS to help customers understand that the photograph has been altered.

How to Retouch Skin Using Dodge and Burn to Get a Natural Result

The trend in the portrait, fashion, and beauty industry is to come back to a more natural look while still removing the unwanted blemishes. But without the proper techniques and settings, it’s difficult to make an image flawless while avoiding the overly retouched look. Zoë Noble is a talented photographer and retoucher based in Europe, and she’s created a series of tutorial to teach the methods that will help you reach that high-end look. In this one, you’ll learn how to use dodge and burn to even out the skin.

Add Life to the Eyes in Your Photos With This Clever Technique

Eyes really are the window to the soul, and the way they look in your images can be the difference between a picture being good and really great. If you have a portrait that you feel is lacking something, then adding depth and dimension to the eyes may be just what you need.

Distinguish Luminosity Levels in Photoshop Better Than Ever With This Visual Help Layer

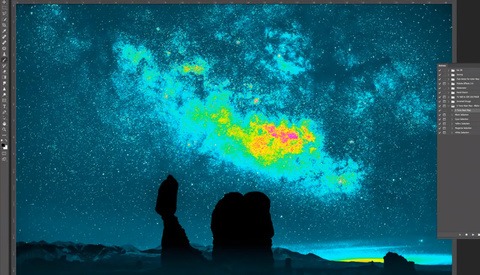
Seeing colors and luminosity correctly is not always easy. You could calibrate your screen and be stuck working at the same place every day, but some people just can’t have a fixed office or studio. And even with a calibrated monitor, adjusting luminosity to your creative vision can get tricky. This is where visual help layers come in, especially one called the five-tone heat map. Blake Rudis from f64 Academy shows you how to use and why it’s so useful.

Want to Go Viral? Here's How to Retouch a Portrait Like That Internet Sensation

Unless you've been completely off Internet for the past 24 hours, you'll have already seen the amazingly unique retouching skills of a portrait photographer in Missouri. While there is speculation on whether this is real or some kind of publicity stunt, one thing is clear: the photos are hilarious. Someone was bound to create a how-to at some stage, and thankfully, one of our favorite YouTube Photoshop wizards, Antti Karppinen, was quick on the draw. Pun intended.

Color Grading With Aqua And Brown Made Easy In Photoshop

When it comes to things like quickly learning new Photoshop techniques, I am a straight to the point type of guy. I don't necessarily want to (though I certainly do on occasion, depending on the topic) watch an hour long videos explaining the minutiae of every click of the mouse. While I appreciate production values and the personality that can be on display in a video, sometimes all you need to know can be learned from text overlay and elevator music. That's what we have on deck today, enjoy.

How to Create an Artistic Typography Portrait in Photoshop

Makeup is one way to create a superb artistic portrait, but it’s not the only method. You could rely on post-production as well to make something different than everyone else does. In this 15-minute long tutorial, Nate from Tutvid shows you how to inlay someone’s face with text.

[Updated] Colorize This Image From the Nikon D850 and Win a Free Fstoppers Tutorial

As you all know, we are currently pushing ourselves here at Fstoppers HQ to produce 30 videos for the month of January. Patrick Hall didn't want me to miss out on the fun, so he challenged me to recolor an image. Not an old black and white one, but an image he took with our new Nikon D850. Want to give it a try too? You could win a free tutorial if you've got what it takes to colorize an image.

Here's How a Computer Science Student Used Microsoft Excel to Create HDR Photos

Whenever you ask one of your creative peers which software they use to edit, you’re probably expecting an answer along the lines of "Photoshop" or "Lightroom." Microsoft Excel is unlikely to be high up on your list – but software engineer Kevin Chen has actually managed to create an HDR photo using exactly that.

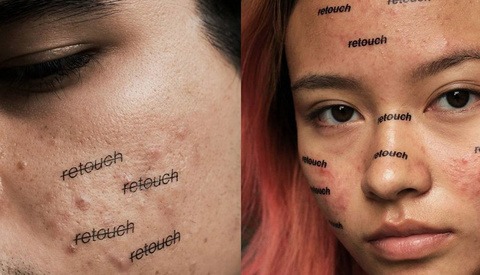
How to Clean Skin Using the Clone Stamp Tool to Retain a Natural Look

Cleaning skin is one of the most tedious tasks there is when it comes to portrait retouching. It takes quite a bit of time, and when done improperly, the texture can quickly become mushy. To keep the final image as natural looking as possible, there are a couple of techniques that can be used to limit the number of pixels we alter. In this tutorial, Zoë Noble demonstrates how she uses the clone stamp tool to clean the skin.

Fstoppers Reviews Pixelmator Pro: Not the Photoshop Alternative You're Looking For

In late November 2017, Pixelmator Pro was released to those eagerly awaiting a new photo editing solution on the Mac. Whether it was to finally escape the never-ending Adobe Creative Cloud subscription fee, or for those just getting started in photography and looking to get their toes wet, there was a good amount of hype and excitement leading up to its release. One month later, here’s my early impressions of Pixelmator Pro.

Build and Photograph Your Own Miniature Set Using Only Household Items

With the holiday season in full swing during December, I decided to put my camera down and focus on coming up with new ideas and concepts rather than just shooting straight away. Being a big fan of Felix Hernandez Rodriguez and the miniatures he brings to life through his photography, I decided to build my own set and photograph it.

Set the Mood of Your Images Easily Using Capture One's Color Balance Tool

When Capture One 9 was released about two years ago, one of the most noticeable features was the color balance tool. It makes color grading very visual and effortless, even if you don’t have a solid knowledge of color theory. Along with tethered capture mode, the layers introduced last December, and the default color profiles, it has become one of the primary reasons why Phase One’s software is the standard in the commercial, fashion, and beauty photography industry. In this six-minute long video, Zoë Noble will show you how it can set the mood of your images and help speed up your editing process.

How to Export a Video in Premiere Pro Even if You Are a Beginner

You recently got into video and decided to use Adobe Premiere to edit your footage. That’s fantastic. But now, with your first timeline done, you find yourself in an awkward position: what settings do you use to export your sequence in the best way possible? With photography it’s quite easy, but videography is whole different thing. There are tons of options to choose from, and that’s once you’ve gone past the tens of export formats. In this short tutorial, Justin Odisho will show you how to get a great exported file without having to learn all about codecs, bitrates, and other barbarous settings available.

How to Quickly and Easily Color Grade Your Footage With 3D LUT Creator

Colors straight out of camera vary greatly between brands and sensors. Canon has been known for a long time for its great skin tone reproduction, while other manufacturers have created more troubles for colorists and retouchers to get perfect tones without a solid post-production workflow. In this tutorial, Chrystopher Rhodes from YCImaging shows how he uses 3D LUT Creator to get perfect colors out of his Panasonic GH5 and goes further by quickly demonstrating how you can color match your footage to any picture or video you like.

How to Add Splashes to Your Product Photography With Exposure Blending

Depending on your project or assignment, commercial photography can allow for some creativity to be added to the photo. Creating splashing in the background or even having the splashes hit the product or subject can be one way to add some interesting factors to the shot. How would you set up the shot?

How to Use Adjustment Layers in ACDSee Photo Studio Ultimate 2018

Recently Fstoppers reviewed ACDSee Photo Studio Ultimate 2018, the newest version of their all-in-one editing flagship. If you are not familiar with ACDSee’s platform, it is an editing suite similar to Capture One Pro or Photoshop, but also includes photo managing tools and quick editing capabilities similar to Lightroom. This gives ACDSee a unique combined platform that simplifies the average user’s workflow and eliminates the costly need for multiple programs.

How Many Megapixels Do You Need?

How many pixels do you need in an image? Sounds a simple enough question and the inexorable megapixel race doesn't seem to have ended, in much the same way that the PC processor race marched on unabated for several decades.

Delivering Images and Video for Non-Calibrated Screens

You've probably seen thousands of articles on screen calibration and you may strive to deliver perfect images and videos. Unfortunately, in the end, your client views them on their non-calibrated way-too-blue or way-too-orange screens. Sometimes they say "looks good to me." Other times the response may be "it's too dark," or "it's too blue." They may even edit your photos to make them look "better." How do you handle these situations and is it really critical for you calibrate your monitors?

Make Your Instagram Photos Pop Using Adjustment Layers in Photoshop

Adjustment Layers are probably one of the most useful, and most used tools in Photoshop. It's one of the best ways to keep a non-destructive editing workflow in place and offers additional features such as blending modes to add exciting effects to your images. With all this in mind, why don't we see how we can use it to make our Instagram images stand out more?

Utilizing Lightroom Presets in Luminar 2018

There have been debates circling the internet lately on users abandoning Adobe’s eco-system of photo applications for a new player in town. Macphun, soon to be Skylum Software, has been making waves lately with their latest release of Luminar 2018. The once strictly Mac-based software company has branched out (part of the reason for the renaming) to include Windows users as well, and people are stoked. With a seemingly endless list of features and upgrades to the latest version, many have considered that it may be about time to try something that’s just different than the industry giant, Lightroom. However, users are still perplexed on how exactly they would make the change, what would they miss from Lightroom, and is it really necessary.