Recent Photoshop Articles

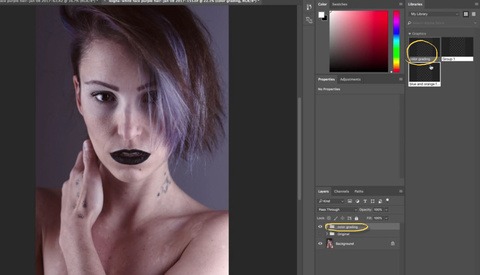
How to Convincingly Composite Images in Photoshop

Compositing images well is one of those skills that can really flex your photographic prowess by calling on a multitude of techniques, all of which you have to have a sound basis in to create a convincing final product. This great tutorial will show you all the steps.

Bite-Size PS Tutorials: Creating Even Colors in Your Images

One of the most obvious telltale signs of an unprofessional commercial or product image is color. The most famous and readily cited issue is color grading, but it's not the only problem and the uniformity of color is often neglected. That is, the even color of the object or two objects' colors truly matching. As always, I will couch my method in the sentiment that it may not be the optimal technique, but it works very well for me.

One Hour of Eye Retouching in Seven Minutes

When asking people what they hate retouching the most, usually the answer is anything hair related. It requires a tremendous amount of precision and a lot of time. Something retoucher Pratik Naik seems to have, at least according to this video in which he fixes eyelashes to perfection while keeping them natural looking. Have you ever wondered how high-end retouchers achieve such result? Then you should definitely watch this time-lapse.

Use Photoshop CC Libraries to Speed Up the Color Grading Process on Photosets

What is your workflow when you have to give the same color toning on a set of images? I guess like me you open an image, make your changes, then copy all those layers one by one to the other files. This sounds a logical and easy way, until you watch this video from Steven Spaulding.

How to Simply Correct Localized Color Issues Using Photoshop

When looking at retouchers’ portfolios, you can separate the great ones from the rest by looking at their color correction. For example, when skin tones are not uniform, it makes the makeup artist look terrible just as much as the retoucher. There are multiple ways to correct color issues, but let’s see one that’s incredibly fast and easy to use for small localized issues, no matter what your photographic genre of choice is.

Bite-Size PS Tutorials: Using the Cinematography Technique 'Crushing the Blacks' to Improve Your Images

Generally speaking, losing detail in your image is a bad thing. However, there is a creative way to do so that is most commonly employed in cinematography, known as "crushing the blacks." I alluded to this technique in my recent article on creating your first Photoshop actions and I received a number of queries about this technique. This article will give you a brief overview of what the effect is used for, why you would use it, and how.

Where is a Woman's Place in This Nation?

Masses gathered around the country to march in support together for women's rights. While each had their own unique story, most of what was heard was from adults in response to the new administration. One photographer wanted to go back to the youth of our nation to see how young girls and boys felt about these current issues to get to the root of the innocent take on the rights at hand.

Learn the Best Ways to Make Selections in Photoshop

The better you are at selecting things, the better you are at Photoshop. It's one of the most fundamental skills. This great tutorial will teach you a multitude of ways to effectively and efficiently make selections in the venerable app.

How to Create Dramatic Skies in Photoshop

Properly post-processing the sky can be what really sends an action shot, environmental portrait, or landscape image over the top. This quick tutorial will help you create compelling skies that complement your scenery.

Ten Photoshop Tricks You Might Not Know

Photoshop is a sort of neverending story: just when you think you know all its features and tricks, you discover something new. This great video highlights ten such features you might not be aware of.

Learn How to Use Tone Curves to Improve Your Photography

I hear a lot of photographers talk about tone curve shapes: the s-curve for contrast, for crushing blacks, etc. But really taking advantage of tone curves is less about memorizing shapes that produce specific results and more about understanding exactly what they do. This great video will get you up to speed in no time.

Here's What Working With Photoshop 1.0 Was Like

The year was 1990. The Hubble Space Telescope had just been launched, Microsoft released Windows 3.0, and Sinéad O'Connor wanted you to know that "Nothing Compares 2 U." In addition, Adobe released Photoshop 1.0, starting the revolution.

How to Easily Turn Headlights on in Photoshop

Have you ever captured a really amazing picture of a car or motorcycle only to realize that you forgot to turn the headlights on while you were on location? Don't you worry about a thing because Photoshop makes it a breeze to flip on those high beams in just a few easy steps.

Fstoppers Reviews 'Car Photography and Retouching with Easton Chang' Tutorial Series

I have always had a passion for cars, which is what set me in the path of becoming a photographer. From casually taking photos of various cars with a point-and-shoot at local events in the beginning, I decided to go beyond that and see where I could go with a camera. Scouring the Internet to learn as much as possible, there have been a group of automotive photographers that stand out to me amongst the best, and Easton Chang is among them.

Annoyed With That White Outline Around Your Model? Here's How to Remove It in Photoshop

I love shooting on location and am passionate about deep blue skies. Usually I would use CPL and ND filters to get the best skies to my taste. A detailed article about how to get dramatic skies is described in my previous article, "The Ultimate Guide to Dramatic Skies in Portrait Photography." After the shot is taken I always play with the luminosity and saturation values of the blue tones. One issue I often face while darkening the skies via luminosity is having a white outline appear around my model. Today I will take you through a short tutorial of how to get rid of that quickly and effectively, without the need to compensate on your luminosity.

toddler blowing a kiss

One of my favorite setups for studio portraits of children was inspired by Jill Greenberg’s photos of crying babies. These portraits are fun, simple, and focus on teasing out a variety of natural expressions of children as they are being photographed. This tutorial demonstrates how to photograph and edit this particular style of a three-light children’s portrait.

Bite-Size PS Tutorials: Quickly and Easily Create Your Own Photoshop Actions

Everyone and their Auntie seem to sell Photoshop action sets these days, as if they're the answer to something. I'm primarily referring to action sets which create entire "looks" for your image, but there are uses for actions which are less comprehensive and arguably more useful. For example, I use an action for sharpening my images which creates a layer I can lower the opacity of or mask until it is satisfactory. Actions like these are easy to create and can result in accrued time saved. This guide will ensure even people whom have just picked up Photoshop for the first time can create actions.

Techniques to Improve Your Composites from Film

Many photographers have that one muse who inspires creative projects, knows exactly what the direction is, and is always the perfect collaboration. One artist found his own muse in himself when he set forth on a project to capture every stage of emotion of his own work. Creating composites from film, this artist brought a new light on the emotional range that photographers face everyday.

The Advanced Six-Step Program to Processing the Aurora in Lightroom and Photoshop

We've planned for the aurora and captured a ton of images in the previous episode. We've left the arctic and are back at home under the soft glow of our calibrated screen. It's time to process these babies. Be aware that there's advanced editing stuff ahead. If this goes straight above your head, I recommend that you stick with processing in Lightroom until you've got that under control. We have a lot to cover, so let's get started.

How to Create Seamless Cinemagraphs Using Photoshop

Cinemagraphs may not be new but they seem to be popping up more and more as mobile media plays a larger roll in content creation. There are lots of ways to make them using various software and even a few dedicated mobile apps. However, if you want to make one with just a video clip and Photoshop, YouTuber Peter McKinnon's latest video makes it quick and simple.

Adding Fog and Light to Your Photos for Atmospheric Effects

How many of you like to add atmospheric effects to your work to give them more life? This is completely subjective but I tend to add fog and light streaks to my automotive glamour work to give it a little more “pop.”

To #Filter or to #Nofilter: It's Not Even a Question!

In the days when film reigned, most people thought that once you took a photo, the image was completed. They thought that clicking the shutter was the end of the process (They obviously didn’t know much about darkroom manipulation). But, as photographers know, that “click” is only a small part of the photographic process. The rest lies in forethought before taking the image, and the way in which it’s processed after it’s taken.

Adding Stars to Your Nighttime Photography

Taking photos at night can be an incredibly creative and rewarding experience. Unfortunately, increasing levels of light pollution in cities and urban areas makes it virtually impossible to include any detail in your sky which is often a major aspect of your composition. Adding stars is an easy and effective answer to this problem. With simple masking and blending techniques you can add interest to your background and give the impression of being in a secluded, faraway place. The most common error is overdoing it by adding too many stars or trying to integrate them into a scene that simply does not look natural. Here are two quick techniques which aim to avoid these pitfalls.