Recent Post Production Articles

How to Fix Common Skin and Hair Issues Using Texture Grafting

From a retouching standpoint, there are few things more unpleasant or challenging than dealing with chunks of hair on the face, missing patches of skin texture and large folds of skin. Generally the existing tools in photoshop such as the healing brush or patch tool fail in these situations and we often end up with unnatural or unpolished results. When all else fails I often turn to a technique called texture grafting to deal with a multitude of issues.

Fstoppers Review Of The Panasonic Lumix GH4: Is It Ready For Professional Use?

In short, no it is not. But a few minor dealbreakers are all that stand between leaving this camera on the shelf, and making it best digital camera in its class.

After nearly a month of capturing video, stills, and timelapse media with the Panasonic GH4, I laughed, I cried, and I almost threw it off a mountain. At times it was a joy to shoot with, and other times it wouldn’t even power on with a full battery. I’ll give you a complete, unbiased rundown in my full review, complete with video samples.

The Most Intelligent And Precise Way To Sharpen Images In Photoshop

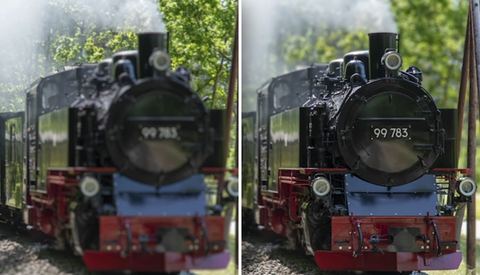
With the multiple methods of sharpening in Photoshop, a big issue is that many of them are applied globally without any consideration to edges and areas with varying level of per-existing sharpness. The result of these techniques can enhance issues of fringing or inconsistent results across the image. This method by Michael Woloszynowicz is by far the most intelligent method I've seen so far.

Exclusive: RED Has Big Plans To Be Your Still Camera Maker

You read that headline correctly. After making a huge splashes in the motion-capture industry since 2005, Red has big plans to be the only camera system you use on set for both your motion AND still photography needs, and it's closer to being a reality than you would think. Prepare to have your minds blown.

How Good Is the New Masking Tool in Adobe Lightroom?

Adobe has rolled out some impressive updates to Photoshop and Lightroom, particularly when it comes to automated tools. The new masking tool in Lightroom allows for automatic selections of skies and subjects, but how good is it?

Add Lens Flare To Your Image The Right Way

I'm sure most of you have taken one look at the lens flare filter in Photoshop and decided to quickly over look it. Well I am here to say that you might want to reconsider and give it a chance. With the right steps and processing one can actually make it look decent. Now I'm sure there will be a few people that will still think adding flare is asinine, and to that I say to each their own.

10 Ways To Get a Fresh Look at Your Photos in Lightroom

Our ability to perceive the environment around us in the visual spectrum, or visual perception, is a combination of molecular biology, neuroscience, cognitive science, and psychology. These various vision mechanisms often change how we perceive what we see and can even vary depending on the environment in which we see them.

How to Create The Popular Matte Look in Lightroom

While in Las Vegas attending the annual WPPI conference I stopped in and spent some time at the print competition. There I repeatedly noticed that many of the prints had a matte type of look to them. Now part of this is the choice of paper they print on, but also how the photos is processed plays a big part as well. I created this quick video to share with you how this look is achieved very easily in Lightroom. I have also included some sample before and after photos below.

Two Great Reasons Every Photographer Should Crop Their Photos

Have you ever wondered when, and why you should crop a photo? In this post I'll explain how using the crop tool effectively can hugely improve the storytelling abilities in your photography. I'll also show you how cropping a photo can take your shot from average to great by allowing you to follow some key rules of composition.

How To Edit/Fix Backlit Photos

Every photographer has been faced with the task of photographing subjects in front of beautiful sunrises or sunsets. Ideally, you'd have a light, but if you don't or the subject is too large to light, you're going to have to fix the image in post.

How Do You Create the Perfect Skin Tone?

When speaking of retouching, most people think of cleaning skin and altering the body shape. However, retouching goes further than that. Colors play such a significant role in an image, that forgetting about them would be a great mistake. Just like a good makeup artist shouldn't limit their job to the model's face, a good retoucher shouldn't stop the job with cleaning skin.

Your Eyes are Fooling You - How To Maximize your Editing Productivity

Ever spend hours editing photos, only to review them later and wonder what you were thinking? The environment and mindset we're in will greatly effect the final results of our work, and can lead to countless hours of re-editing simple mistakes. Here are a few steps I've put together that help me ensure that my final product is always the best representation of what I'm capable of, simply by recognizing the conditions that my mind and eyes need to work properly, and incorporating it into my work strategy.

Lightroom Film Preset Done Right

There are lots of presets out there for sale emulating the look of film. Enough so that when I heard that Mastin Labs released one I didn't pay too much attention. Fortunately, because of the nudge of a friend, I decided to look into it a little further and I am glad I did. This is the first time I have seen a Lightroom preset designed by a film shooter for film shooters to help them match their digital images from a wedding with those shot on their film. Fortunately for those only shooting digital, you can benefit as well.

The Ultimate Comparison of Nine Noise Reduction Methods for Night Photography

Imagine yourself under a starry night sky. Wouldn’t it be great to capture the Milky Way to show it at home or on the web? Unfortunately, you are left with a black frame after you’ve pointed the camera upwards at settings you are used to. It's time to open up the aperture, lengthen the exposure, and bump up the ISO. You will introduce noise, but do you really care? Aren’t there tools out there to reduce noise but still keep the detail?

The Dehaze Tool: A Simple Tool That Can Make a Big Impact

When it comes to processing your digital images, there are so many tools available to you and sometimes the process can seem a bit convoluted. Personally, I like to use a mix of both Adobe Lightroom and Adobe Photoshop to make the most out of my images. Perhaps I'll throw Capture One in the mix one of these days, but for now all of my postproduction work is done using Adobe software. This brief tutorial goes over one of the lesser-known tools that exists both in Lightroom and Photoshop, the Dehaze tool.
Good Images Don't Always Start Pretty: How I Shot and Rescued One of My Most Liked Images

I’m a big fan of getting images right in camera, and it's something that strive to do. I think there is something to be said for the skill that it takes, especially when shooting an event like a wedding. Getting the perfect light, the perfect composition, and the perfect moment while dealing with all the different variables of the day is quite a feat. The main image I’m going to be talking about today, though, does not fit into this category, but it still manages to be one of my favorite and most "liked” images.

10 Ways to Make Colors Pop in Lightroom

Photos often lack a real punch when we import them for editing, this is especially apparent when importing raw files to Lightroom because it strips the shot of the overriding camera settings making them seem lackluster. Luckily, there are 10 simple ways you can make your colors pop once again.

A Look at Three Apps for Editing Photos on Your iPad

Apple's iPad line, particularly the iPad Pro, is more powerful than ever and features fantastic displays paired with useful accessories for creatives on the go, making them a more viable solution for post-processing work than ever before. If you are thinking of editing your photos on your iPad and wondering where to start, this great video will show you three editing applications and discuss their pros and cons to get you up and running in no time.

A Powerful Way to Change Focus With Photoshop Filters and AI

Have you ever had to shoot a photograph at f/11 while wishing you were shooting f/1.8? If you've ever wanted to change the depth of field of a photograph, you know that creating a depth map isn’t the easiest thing to do. Instead of struggling to create the perfect depth map in Adobe Photoshop, using selections and brushes, this video guides you down a simpler path.

The 2017 High-End PC Buyers Guide for Photographers Running Photoshop

We're going to build our very own photographers PC, capable of working at blazing speeds with 50-megapixel images and dozens of layers in Adobe Photoshop. The high-end system we will be discussing here will have a budget of $1,500 in mind. For this, we're going to build our post-processing dream PC, but it doesn't include a monitor. Let's start comparing specs.

How to Properly Use the Liquify Tool in Photoshop

Liquify gets a bad rap. Its misuse accounts for a pretty alarming number of Photoshop disasters. And although it is easy to learn, it does take a great deal of time and energy to master. Luckily, Aaron Nace over at Phlearn is here to help. Known primarily as the "digital plastic surgeon" of Photoshop, the liquify tool can also be applied to tremendous effect when it comes to making clothes fit to perfection - and that's exactly what this video shows.

Will the New Luminar 3 Let you Ditch Lightroom?

The long awaited version 3 of Luminar from Skylum arrived this month. It held the promise of new features, and digital assets management tools (DAM) that would rival Lightroom. That's important, because some percentage of photographers don't like the Adobe subscription model, and while powerful, Lightroom's Library management can be a pain. Of course others love it, and would never switch.

How to Switch From Lightroom to ACDSee Ultimate 2018: Part 1

A couple of weeks ago, I reviewed ACDSee's latest photo editing software release and even said it could replace Adobe products in many ways for Windows users. It was only wise to back that statement up with two complementary articles, this one being the first, showing to Adobe users how they could switch from Lightroom to ACDSee. In today’s write-up, I’ll concentrate on bringing files from previous Lightroom catalogs into ACDSee and also on how to manage your pictures in ACDSee Ultimate 2018.

5 Techniques in Adobe Lightroom Raw Processing You Might Not Know

Lightroom has become even better and more powerful the past few years and knowing all the little tips and tricks in the software with each new update can be a class in itself. Here’s five techniques you may not know that the Adobe raw processor can do to help you make better images faster and easier.

3 Simple Steps Every Photographer Can Take to Immediately Improve Their Compositions

The mistakes you make in life, including photography, leave a tart, bitter taste in your mouth, especially when they’re your fault and entirely avoidable. The solution? Don't make them. Here are three easy steps photographers from any genre can implement to immediately improve compositions and eliminate unnecessary errors.

Spaghetti and Histograms: Exposure to the Right

When shooting digitally, more information is almost always better. Here’s an exposure technique that maximizes the available information your camera can gather in a photograph.

Lightroom Tricks to Speed Up Workflow and Increase In-Person Sales

Lightroom is sometimes underutilized during post-production and IPS (in-person sales) during a boudoir reveal. Here are some tricks to increase the speed of your IPS sessions in order to move fluidly through the sales process and increase the number of clients who upgrade to your next collection.

To Underexpose or Not to Underexpose, That Is the Question

Photography is all relative to the creator and the viewers, so the decision of whether to underexpose, overexpose, or to expose your portraits evenly is obviously subject to personal preference. There is merit to any of the methodologies that you could apply to your own photography and it really just comes down to figuring out what works best for you and your gear.

Stop Using Clarity Like This In Post-Processing and How to Do It Better

The times of oversaturating and selective coloring might be over, but clarity is here to pick up where those post-processing horrors left of. Now don’t get me wrong, I think that clarity is an amazing effect that can do wonders on your images… just not if you use it on the whole image and crank it to the max. I realize, that seeing this sudden increase in drama and grittiness might feel satisfying to some but too often has it used in attempts to turn uninteresting photos into something that they are not.

The Ultimate Screen Calibration Guide

Talk to a photographer long enough and the question of screen calibration will be brought up. Often many will say it's an incredibly important tool in your post production workflow, and often many more disregard it all together. So what is screen calibration? Is it still a viable issue within photography today, or is it becoming more and more obsolete, like sync cables and light meters? I'm here to explain it to you.

When and Why You Should Turn Your Images Black and White

For many photographers, particularly hobbyists, making an image black and white is almost arbitrary. I remember in the early days of my photography, I was the same. I would mutter: "I wonder if this would look good in black and white," and then, I'd try it. Sometimes, it would look better, but usually, it would not. I presumed it was all just down to taste, but that's not true. After years of reading around the subject and experimenting, I began to understand why it worked when it did and conversely, why it often didn't. Here are some key elements that ought to be present in black and white images, and why.

How to Edit Your Pictures Like Instagrammer Sam Kolder Using Lightroom

We have all been guilty of watching someone’s Instagram account and wonder how the hell the pictures are edited. Sebastian from TechGenie has recently been creating videos to demonstrate how to mimic some famous Instagramers editing style. The latest one on the list is named Sam Kolder and his desatured teal and orange look.

A Quick Rundown of All the New Lightroom 2024 Features

In the past few months, Adobe's suite of software has rocketed forward with features, most of which are AI-powered. Now, Lightroom 2024 has a plethora of new functionality that could be useful to you, so here is a quick rundown of what's new and what each addition does.
The Best Way to Change Color in the Latest Version of Photoshop

Just like everything in life, Photoshop techniques change or require slight adjustments. What may have been perfect two years ago might not necessarily be perfect now. And so it is with changing colors of objects in Photoshop. Here is the latest on how to do it effortlessly.

How to Add Light Rays to Your Images in Adobe Photoshop

If you're open to more heavy-handed retouching of your images, you have almost limitless possibilities of what you can do with even the blandest of images. In this tutorial, learn how to create realistic light rays and dappled light to add some atmosphere to a photograph.

How To Sharpen Eyes In Your Portraits To Make Them Pop

When looking at portraits, we have a tendency to look at the eyes first. We can't help it, it's part of human nature. This is why I personally believe it is extremely important to capture and refine the eyes in your photos to create more engaging portraits. Retoucher Michael Woloszynowicz created an awesome 4 part video series about how to make your eyes look amazing in post production. See the rest of the post below to watch video parts 2 through 4.

An Entire Wedding Shot On An iPhone And Processed Using Instagram

Kim A. Thomas, a photographer out of San Francisco, recently shot an entire wedding using just her iPhone. She processed everything using Instagram as well. The couple, Jonathan and Brandi, wanted her to do so by request. She never used an SLR for any of the shots. Her main camera was the iPhone 4s with an iPhone 4 as a backup. She did use an SLR mount for her lenses and a tripod. Take a look at the shots and let us know what you think of them!