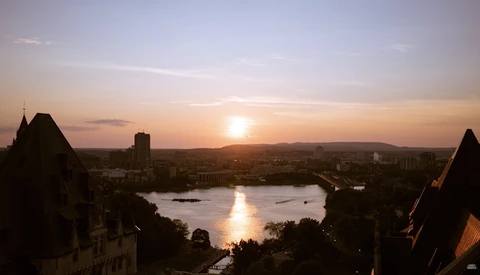
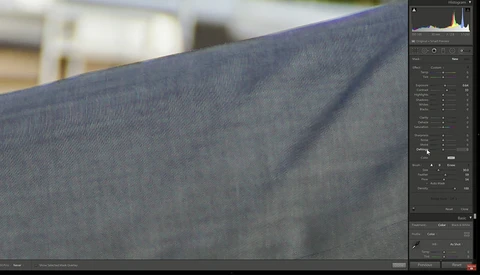
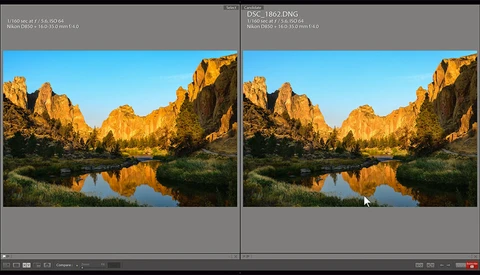
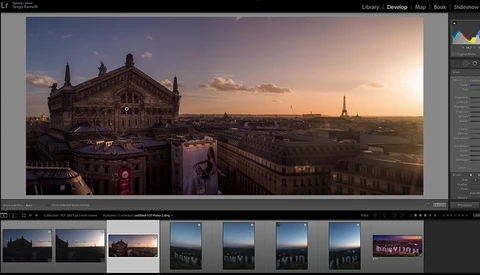
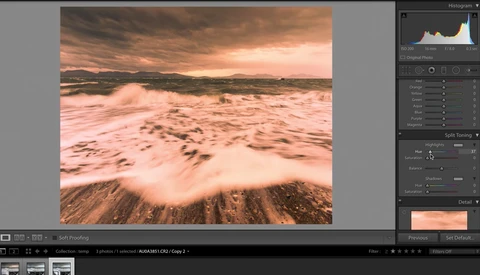
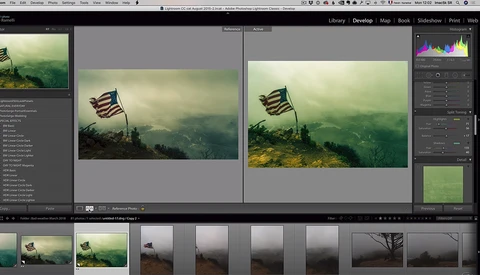
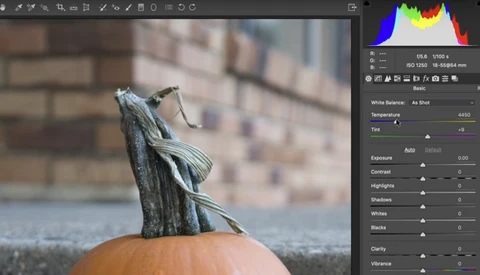
On-The-Go Digital Storage Tips for Photographers
If you've been having trouble keeping your photos in an organized yet future-proof way, then check out my thoughts on the issue here.
The tone curve in Lightroom and Adobe Camera Raw (ACR) is a powerful tool. Subtle changes to the tone curve can make a big difference in the look and feel of your image. Here are a few tips and tricks that will make your tone curve adjustments easier and more precise.
We all know that Lightroom has its ever-growing list of issues. Yet for IT-illiterate folk like myself, the change can be daunting. However, my move to C1 is perhaps the best thing I have done in 2019.
Last week, Adobe reported that the fourth quarter of 2019 was the most lucrative in the company’s history, delivering annual revenues of $11 billion. Given that it’s rare to hear a good word said about Adobe in the world of photography and videography, why is the company still so incredibly successful?
One of the greatest merits of YouTube for photographers is being able to watch people edit their images from start to finish. This walkthrough is a superb example of that.
Post-processing is your chance to really add your personal signature to a photo, and one of the most common styles photographers like to embrace is adding drama to their images. This excellent video tutorial will show you five ways to add more drama to your photos using Lightroom.
Lightroom's Adjustment Brush and Spot Removal Tool have improved in leaps and bounds over the past few updates, opening the door to quicker, easier portrait retouching for photographers of all editing skill levels. Here are five steps to quick and easy portrait retouching in Lightroom.
As we enter the winter photography season for the northern hemisphere it’s the best time to get out to the desert or arid areas to shoot landscapes. Cooler day time temperatures and some interesting areas in the national parks make for a great trip especially in places like Death Valley with its ubiquitous sand dunes, but how do you edit those images to really make them stand out?
The introduction of profiles in Lightroom and Adobe Camera Raw was a significant addition to editing for Adobe users. Not only can profiles improve your editing power, but they can also simplify your post-processing workflow.
Buried deep inside Lightroom's menu is a highly useful feature: the secondary display function. This can make your workflow both far easier and much more efficient. This great video dives into the secondary display feature to show you how it can be of use to your post-processing workflow.
If you're looking for a raw processor that does more and are not currently using Capture One, it's likely that in your quest for a solution, Capture One has crossed your mind. Making the switch to Capture One from Lightroom, for example, is easier and quicker than you think, and right now, with Capture One's Black Friday sale, it's the perfect time to buy.
In this new video from my YouTube channel, I show you the behind-the-scenes photo edit of a beautiful perched yellow warbler.
One of the things that I enjoy about Lightroom and Adobe Camera Raw is that there is often more than one way to perform the same task. Perhaps the most flexible of these ways are all the different methods you can use to adjust for colors and tones.
The landscape of the portrait photographer has certainly been in flux over the last decade, in which time we’ve seen photos of people go from unreal alabaster-like skin to something much more real, color grading become prominent, and image resolution grow, even though the consumption of images has moved largely to smaller screens.
One of the most subtle but crucial aspects of any portrait is the skin tones. And while you can spend lots of time in Photoshop tweaking them to be just right, sometimes, you do not want to invest that much effort into an image. This excellent tutorial will show you how to get better skin tones using only Lightroom.
Virtual Copies and Snapshots are powerful features in Lightroom that often go unused or underutilized. In this article, we'll cover what they are and how they can be used to make your editing workflow faster and easier.
“Is it difficult or different” should be the stock response to commentary that Capture One is either difficult or has a long learning curve, because the two terms are often conflated, and the reality is C1 is easy (especially the latest versions).
Most of the adjustment sliders in Adobe Lightroom or Adobe Camera Raw are self-explanatory, for example, highlights and shadows. But do you truly understand what is happening when you move that slider?
Lightroom is probably the most used photo database program available, with an integrated raw file editor, and many options for post processing. These thirteen tips can improve your Lightroom experience.
The Lens Corrections panels in the Lightroom Develop Module and Adobe Camera Raw provides the ability to correct lens problems such as distortion, chromatic aberration, and vignetting. These settings are often turned on and never given a second thought.
Whether you’re using Adobe Lightroom, Capture One, or any other raw-processing software, odds are, the default settings aren’t right for you. By taking just a few minutes to consider what you typically shoot, you can save yourself hours in processing and create better-looking images.
Events shooters can generate thousands of images in a very short space of time. But how do you manage that volume of photos, and what can you do with your workflow to make it as fast and efficient as possible?
Many photographers live and breathe by keywording their photos in Lightroom. Keywords can be used both for describing images, as well as combined with other features of Lightroom for organizing, searching, publishing, and exporting photos.
Are you using a tablet for your Photoshop and Lightroom editing? Yes? But are you getting the most out of your Wacom tablet? Probably not if you are like most photographers. You probably set it up on the first day and haven’t gone back to activate all those remaining features.
Lightroom recently added the Texture tool to the Develop module, and it brings with it new capabilities to the program. If you have not had much time to play around with the slider yet, this great video will show you everything you need to know about how to use the slider and where it can be helpful on your own images.
If you're like me and primarily use Lightroom Classic for your photo editing, you probably occasionally edit a photo in Photoshop. If you do, you might be making the same Photoshop file mistakes I made.
Creating panoramic photographs is nothing new; most of us have either had a crack with a camera or maybe even with a phone app/camera. A lot of my work involves creating panoramic/stitched-together photographs with a tilt-shift lens, which in my opinion is the best way to do so.
Lightroom is a complex and intricate application, and it can be easy to overlook features in the program that can make your life far easier and efficient or even open up new capabilities. This helpful video features three tips that anyone using Lightroom should definitely know about.
For many, wildlife photography is all about natural colors and objective realism. The light, composition, and behavior captured should do all the talking. And for the most part, I agree — for that other tiny little bit, though, I beg to differ. Please allow me to elaborate in more ways than one.
Range masking is one of the less used yet more powerful features in Adobe Lightroom. If you haven't used them, check out this tutorial covering the ins and outs.
Each niche in photography has its own requirements when it comes to post-production. In this video, I go over my process for editing images in Adobe Lightroom.
Photographers can almost always use more RAM, particularly when they start working with larger and more complex files. How much do you really need for Lightroom, however? This interesting comparison video takes a look at operating times for the application when using 8 GB of RAM versus 32 GB of RAM to see how much more efficiently the program can run with some extra muscle with which to work.
Whether I'm teaching someone Lightroom or only showing a friend my photos in Lightroom for the first time, the one thing they usually comment about right away is my use of Lightroom's Secondary Display feature. It's a great feature that really makes me more productive.
Lightroom is an intricate program full of numerous features — sometimes so many that it can be easy to miss out on a particularly useful tool that can make your editing life both easier and more efficient. This excellent video will show you one of those tools.
Having completed what proved to be one of the most challenging shoots of my career, I was then faced with the task of editing and compositing the images. Due to my inexperience, getting the results that I wanted using Photoshop proved to be a steep learning curve. Here’s how I went about it.