Lightroom

Adobe Lightroom is where most photographers spend a significant portion of their working lives — and knowing it well makes a real difference to both the quality of your output and the speed of your workflow. This section covers Lightroom from practical angles: import and organization, raw processing, masking and local adjustments, color grading, and the workflow habits that separate efficient photographers from those drowning in a backlog.

Learn the Basics of Lightroom With This Tutorial

So, you decided to kick iPhoto to the curb and step up to Lightroom, but you need a little help getting started. This great tutorial will show you the ins and outs of the application and get you up and running in no time.

Your Reliance on Presets is Going to Cost You Your Job!

Presets are awesome. They've sped up my workflow by an order of magnitude since I first started using them back when I switched to Lightroom years ago. They save time and, therefore, money! But, to quote every action movie ever made: "Is that all you got?"

Free Capture One Color Workflow Webinar With Pratik Naik

After releasing a tutorial video together, Phase One and Pratik Naik are teaming up again but for a 60-minute webinar this time. It’s your chance to see and learn all the color tricks the beauty and fashion retoucher uses to get incredible results with any image using Capture One Pro.

Alien Skin Exposure X2 Adds Advanced Layering Tools

Alien Skin Exposure has long been known as a plugin for Photoshop and Lightroom. But since Exposure X was released, it’s trying to compete with the big names in the raw processing department. The software has grown into a standalone app and isn’t just a plugin anymore. Today, Alien Skin is announcing an update for Exposure X2, making it more powerful than ever.

How to Use Look Up Tables to Edit Photos

Look Up Tables (LUTs) are generally used to changes certain colors and their ranges in video using Adobe Premiere Pro, Final Cut Pro or any professional video editing software. We often edit our photos with actions and presets in Lightroom or Photoshop, but it is possible to edit these photos using LUTs too. This video by Peter McKinnon shows how to do just that. The next time you like a certain look of your videos because of a LUT you applied to it, know that you can use it on a still image too. 

Fstoppers Reviews: Mastin Labs Portra Pushed Film Presets

Mastin Labs out of Seattle is the creator of some of my favorite film emulation presets for Lightroom and Adobe Camera Raw. Today they're releasing their latest preset pack, Portra Pushed. Check it out my review of the pack after the jump.

How to Color Correct Photos in Lightroom

Lightroom has some quick and powerful tools for color correcting your images. This great tutorial walks you through all of them, whether you prefer one-click adjustments or full manual control.

Learn the Full Power of Lightroom's Radial Filter Tool

Lightroom's Radial Filter Tool is one of the most useful local adjustment features in the program, allowing you to easily mask in a wide range of changes. While most of us are aware of its utility, this great video provides a few tips and subtler features you might not be aware of.

How to Create Your Own Preset in Lightroom

Presets are kind of awesome. They're one of the best ways to drastically increase your efficiency in Lightroom and create more consistency between your images. Here's how to create your own.

Learn How to Use Tone Curves to Improve Your Photography

I hear a lot of photographers talk about tone curve shapes: the s-curve for contrast, for crushing blacks, etc. But really taking advantage of tone curves is less about memorizing shapes that produce specific results and more about understanding exactly what they do. This great video will get you up to speed in no time.

Create Colorful Three-Light Children's Portraits

One of my favorite setups for studio portraits of children was inspired by Jill Greenberg’s photos of crying babies. These portraits are fun, simple, and focus on teasing out a variety of natural expressions of children as they are being photographed. This tutorial demonstrates how to photograph and edit this particular style of a three-light children’s portrait.

Scott Kelby Makes His Case for HDR

When you hear the term “HDR photography,” you probably either cringe, or start to smile at the thought of beautifully balanced landscape and architectural imagery created by the likes of Trey Ratcliff. Some may argue that with the dynamic range of current camera sensors, taking bracketed exposures is no longer necessary, since detail can be effectively recovered from both shadows and highlights. In this video, Scott Kelby demonstrates how an image produced from combining bracketed exposures can be superior to one derived from a single frame.

The Advanced Six-Step Program to Processing the Aurora in Lightroom and Photoshop

We've planned for the aurora and captured a ton of images in the previous episode. We've left the arctic and are back at home under the soft glow of our calibrated screen. It's time to process these babies. Be aware that there's advanced editing stuff ahead. If this goes straight above your head, I recommend that you stick with processing in Lightroom until you've got that under control. We have a lot to cover, so let's get started.

Fading Your Presets' Opacity in Lightroom

I’m sure many of you have wished at times that you could decrease your presets' opacity in Lightroom. There isn’t any real option existing, or so I thought until I stumbled upon The Fader by Capture Monkey. It's a simple plugin which allows you to increase or reduce your presets' strength.

Why Every Photographer Should Give a DAM

Aside from being a catchy acronym, Digital Asset Management is an incredibly important concept in the world of digital photography that is too often overlooked.    

To #Filter or to #Nofilter: It's Not Even a Question!

In the days when film reigned, most people thought that once you took a photo, the image was completed. They thought that clicking the shutter was the end of the process (They obviously didn’t know much about darkroom manipulation). But, as photographers know, that “click” is only a small part of the photographic process. The rest lies in forethought before taking the image, and the way in which it’s processed after it’s taken.

How to Set Up Your Mac So You Can Work Most Efficiently

If you're like me, a computer that isn't snappy and intuitive is extremely annoying to you. For those of us that spend hours each day using them for work, changing a few small settings and knowing the right shortcuts can really add up, both in time saved and user experience. Phlearn is here with a great video to get your Mac running correctly.

Create a Simple Time-Lapse Using Lightroom

Time-lapse photography has quickly become one of the most popular forms of creative expression in the past year. A ton of expensive gear and advanced methods exist to produce cinema quality videos like the opening sequence in "House of Cards," but this shouldn’t deter you from getting out and trying it on your own. 

Tricks for Removing Color Cast from Any Image

You’ve got the perfect composition, great light, and an amazing subject. You push the shutter and the image looks pretty good on your mini LCD screen. You import the shot and quickly realize it suffers from a common issue: color cast. 

Save 25% On Your Adobe Creative Cloud Subscription Plan

Creative Cloud has become a staple of nearly any photographer's workflow. The version of Creative Cloud designed specifically for photographers is a sensational deal in itself, offering access to both Lightroom and Photoshop for only $9.99 per month. Today you have an opportunity to drop a quarter off that price bringing it down to an impressive $7.50 per month. B&H Photo is offering a 25% discount on an Adobe Creative Cloud for Photographers one year subscription. Act immediately to take advantage of a great offer that expires at 11pm PST on December 1st, 2016. 

SLR Lounge is Offering 30% Off Every Tutorial

SLR Lounge creates some incredible educational photography content. For the next few days, they're offering a big discount on every product in their store. Between Black Friday and Cyber Monday, every single product in the SLR Lounge store is 30% off. Check out their incredible deals and find which tutorial you'd like to buy HERE.

How to Keep Up With Your Editing

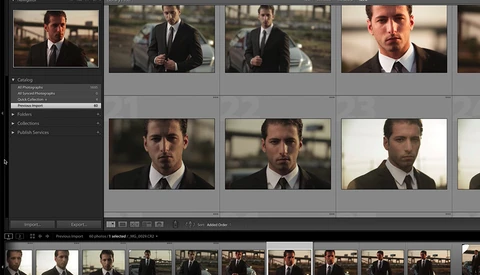
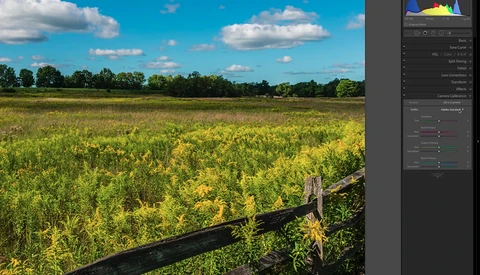
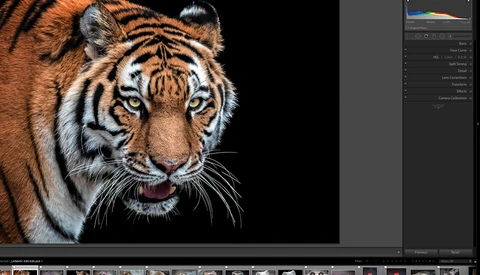
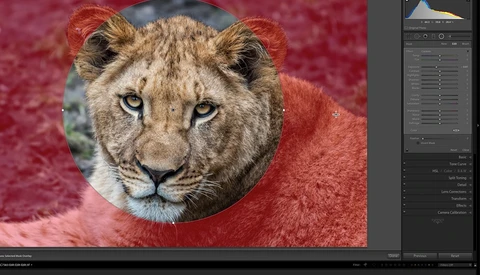
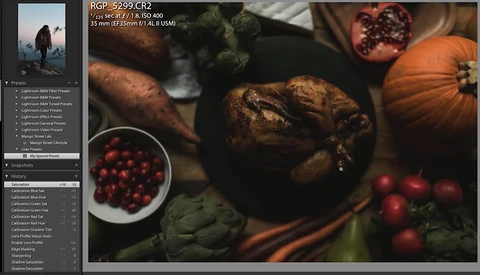
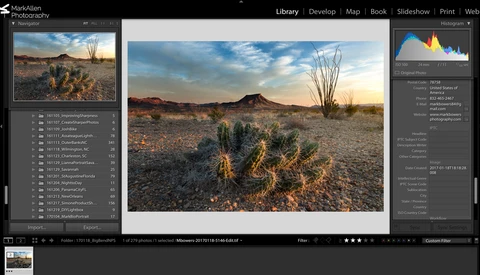
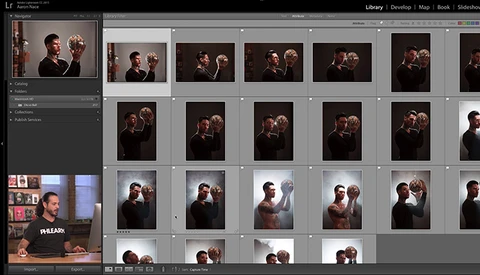
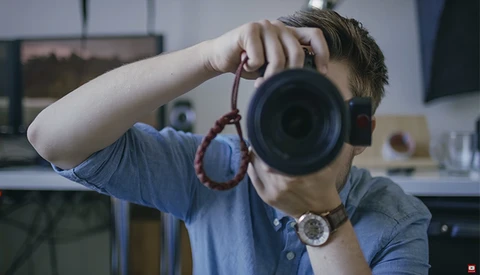
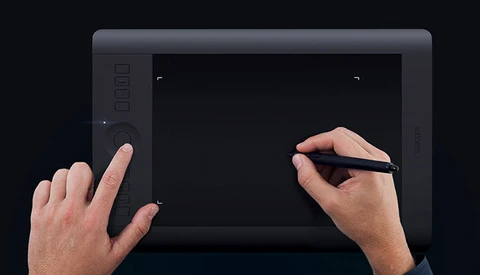
I have had the blessing and curse of having too many photos to edit in the past few months. I've had plenty of opportunities to improve my work with the high frequency of shoots, but it's caused me to feel buried. During a typical shoot, I'll take between 250-400 photos. With each light setup, I'll take a few shots to ensure it's just how I want it, then I'll start directing my model. I strive for 3-4 solid shots per setup, one of which will end up being the final image. Both myself and my hard drives are feeling the pressure. In order to make sure that everyone gets their photos in a reasonable timeframe, I've adopted a new workflow for my editing.

How Viable Is Lightroom's New Raw Editing Capability

I know that all of the iPhone 7 hype is on the portrait mode and DNG file capture that the new camera has, but I was particularly interested in another aspect of iOS's photo capability. Having been stuck on a Nexus 6 for the past year and a half, I missed out on a lot of the new tricks that the iPhones were offering. Specifically, Lightroom Mobile's new raw file support, giving it similar editing capability as the desktop version of Lightroom. 

The New On1 Photo Raw Software Looks Amazing

Image processing has always had very specific tools for very specific jobs. You have your raw processor for the basic editing of images, but for things such as layers and cloning, you had to jump to Photoshop. Then we have software such as Nik, On1, and Alien Skin that can be used for creative effects, film simulations, etc. But the new On1 raw processor is looking to combine all these elements into a single platform with no need to jump from program to program.   

Lightroom Tricks to Speed Up Workflow and Increase In-Person Sales

Lightroom is sometimes underutilized during post-production and IPS (in-person sales) during a boudoir reveal. Here are some tricks to increase the speed of your IPS sessions in order to move fluidly through the sales process and increase the number of clients who upgrade to your next collection.

The Growing Photoshop File Size and How to Open It in Lightroom

Our images are growing fat — so fat that the software we like to work with isn't able to cope with their file sizes. But along comes Sean Bagshaw with a great tutorial on how you can save files that exceed 4 GB in Photoshop that still retain editing capabilities in Lightroom and Bridge.

Adobe Announces New Stock Contributor Program

Today, Adobe has announced the public beta of the Adobe Stock Contributor Site. Meant to integrate deeply with its Creative Cloud platform, the new service allows photographers, videographers, and illustrators to directly upload and sell their work with a high degree of efficiency and automation.

Scanning C-41 Film: A Quick and Dirty Method

There's something absolutely wonderful about holding a piece of film fresh out of processing. The feeling of accomplishment, that indescribable rush of holding something you created in your fingers makes the difficulty of dealing with the medium worthwhile. However, once you're done processing the film, the next phase begins. Scanning can be, to put it lightly, a royal pain. From dust-spotting to tweaking color and levels, there are challenges that must be addressed. This is how I do it!

Get a Free Year of Adobe CC Photography Plan with Purchase of Intuos Wacom Tablet

You heard right, an entire year of Adobe CC Photography Plan for free with the purchase of an Intuos tablet. This deal is only good until September 17, so you might want to act fast before the weekend hits. Though it might not seem like a deep discount, for those photographers out there that find retouching and fine tuning imagery with a physical pen the way to go, this might be perfect for them so don't wait and miss out on a solid deal.

First Look: Adobe DNG Support for Lightroom Mobile App Proves Raw Photography on iPhone Is Superb

Adobe recently released a new version of its Lightroom Mobile app that takes advantage of the raw image support in Apple's just-released iOS 10. Taken on an iPhone 6S running the developer GM seed of iOS 10 (10.0.1), these images show just how good your mobile photos can now be. You'll need to have the latest versions of iOS 10 (running on an iPhone with a 12 MP camera) and Adobe Lightroom Mobile to do this yourself, but we're providing comparison files for testing purposes for those without such access. Tell us what you notice.

Image Size, Resolution, and Math: Understanding the Simplicity of It All

Our clients often hear many terms such as "megapixels," "dpi," or "resolution" and wonder what the difference is between them. As photographers, it is our job to educate them on such terms in order to lessen the confusion when they are asking for certain sizes. However, if we do not understand not only the complexity but also the simplicity of what we are talking about, do we truly understand it at all?

ISO Review: Capture the Night Sky with the ISO-less Nikon D750

The clear night sky under a new moon is almost always the same brightness in the same location. I have blindly put my camera on ISO 6400 as a result. But after having read somewhere that Sony supposedly builds sensors that are ISO invariant, I wanted to test this claim with my own Sony-equipped Nikon D750.

Lightroom Mobile's Amazing Raw Editing Workflow from Start to Finish

Back in July of 2016, Adobe released a major update to Lightroom Mobile for iOS that allows it to work directly with any and all raw files supported by the desktop version and to also sync them seamlessly with the desktop. But what does this actually mean for real-world use? What problem are we actually solving? Let's go on a trip with epic travel photographer Elia Locardi and find out.

How to Shoot a Dramatic One-Light Portrait

One of the best things a portrait photographer can do is learn how to master a single off-camera light. Most photo shoots don’t allow enough time to set up multiple lights, and when shooting on location, carrying more than one light can be too cumbersome to manage. In this video, we see a very useful way to use one off-camera flash with some simple modifiers to create a dramatic portrait.

Adobe Releases Lightroom for Apple TV

Today, Adobe has announced Lightroom for Apple TV. Featuring integration with Adobe's cloud services, it makes for a fun and interesting way to browse and show off your photos.

Dodge and Burn for Dramatic Wedding Photography

Dodge and burn is a well-known technique amongst the retouching community. Most retouchers will use it to smooth out transitions and micro-contrast on portrait, fashion, or beauty images. However, it can be utilized for any genre of photography and broader uses than just skin cleaning. It can be used to direct the viewer’s eye and create more compelling, dramatic images with a few clicks. If you shoot and edit weddings and are looking to step up your post-processing game, this article is definitely for you!

Watch the First Full Lesson of 'Photographing the World' for Free

Last year we teamed up with Elia Locardi, one of the most followed landscape photographers in the world, to film "Photographing The World: Landscape Photography and Post-Processing." This is a 12-hour video tutorial on landscape photography, and today, we are releasing the first lesson for free.

Three Things to Know Before Exporting to Black and White

The perfect black and white conversion technique will vary from photographer to photographer and rightfully so, because there’s truly no perfect technique. it’s subjective. However, there are three key areas that many photographers will overlook before exporting their files that directly influence how their final image will look.

The Ultimate Guide to Dramatic Skies in Portrait Photography

Portrait photography is very diverse. While some enjoy the comfort of studio portraits and the flexibility it brings, others prefer the variety of backdrops the outdoors provides. While it is totally realistic to create all kinds of weather moods in the studio, it often involves a bigger budget, whereas one can achieve similar results for free by relying on the weather forecast and proper equipment choices.